
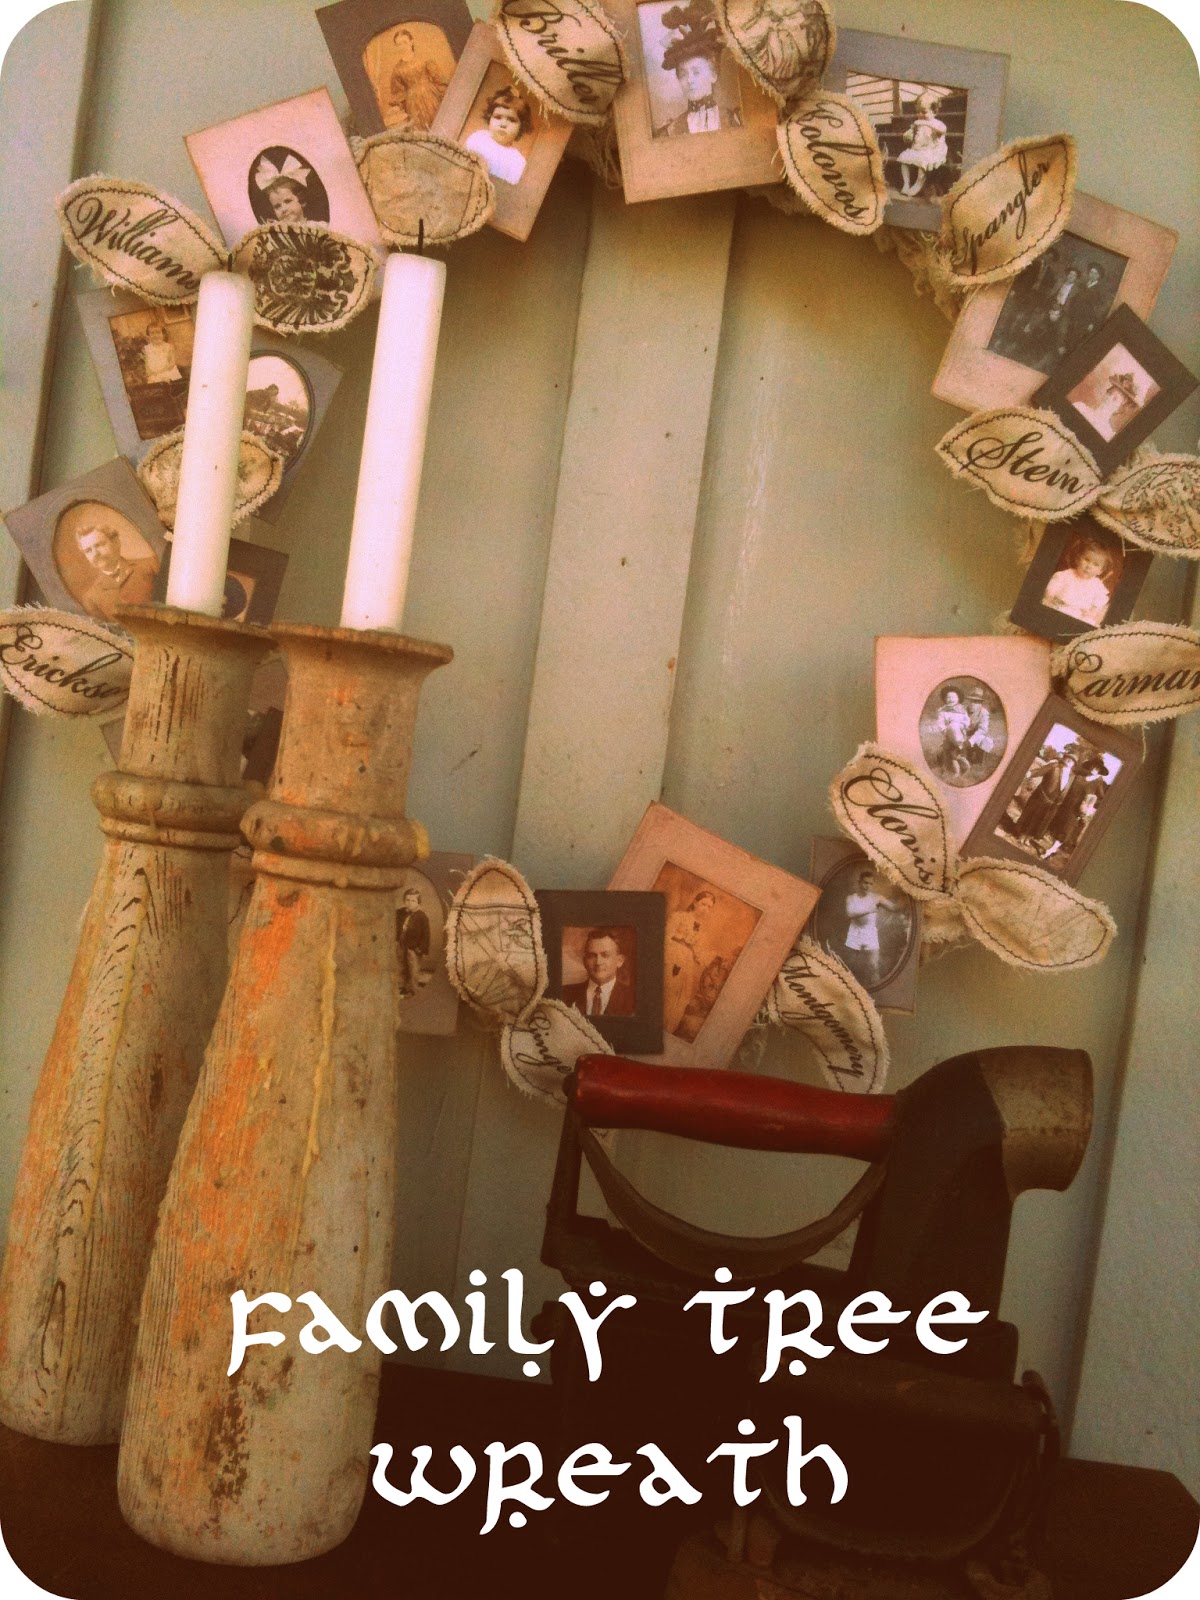
If you’re lucky enough to have a collection of old family photos, where do you keep them? Have your photographic family treasures been secreted away to a chest, drawer or box? If so, here’s a way to bring them out in to the light of day for current generations to appreciate and enjoy…
|
| These are all reproductions |
…While designing the Family Tree Wreath I developed a simple way to make reproductions of vintage photo mattes that when paired with a photocopy of your family photos, creates a quality replica with which you can craft, create, and not fear the consequences of damaging an irreplaceable family heirloom. Just follow the links below to download the vintage reproduction photo matte printables for FREE!
Vintage Photo Frames — Sheet 1
Links to Sheet 2 and Sheet 3 can be found below.
FAMILY TREE WREATH
Materials
Canvas Drop Cloth
Freezer Paper
Leaf Template (download HERE, or freehand your own)Fabric shears
Craft wire (approx. 22 gauge)
Sewing machine with black thread
Tacky Glue
Wreath form (mine came from the Dollar Tree)
3 pieces of 8.5″x11 heavy cardboard or chipboard
Spray adhesive (I used Elmer’s Craft Bond)
Scanned images of family photos
X-acto Knife & cutting mat
Distress Ink (antique linen)
Glue Gun
Scotch tape or Glue stick
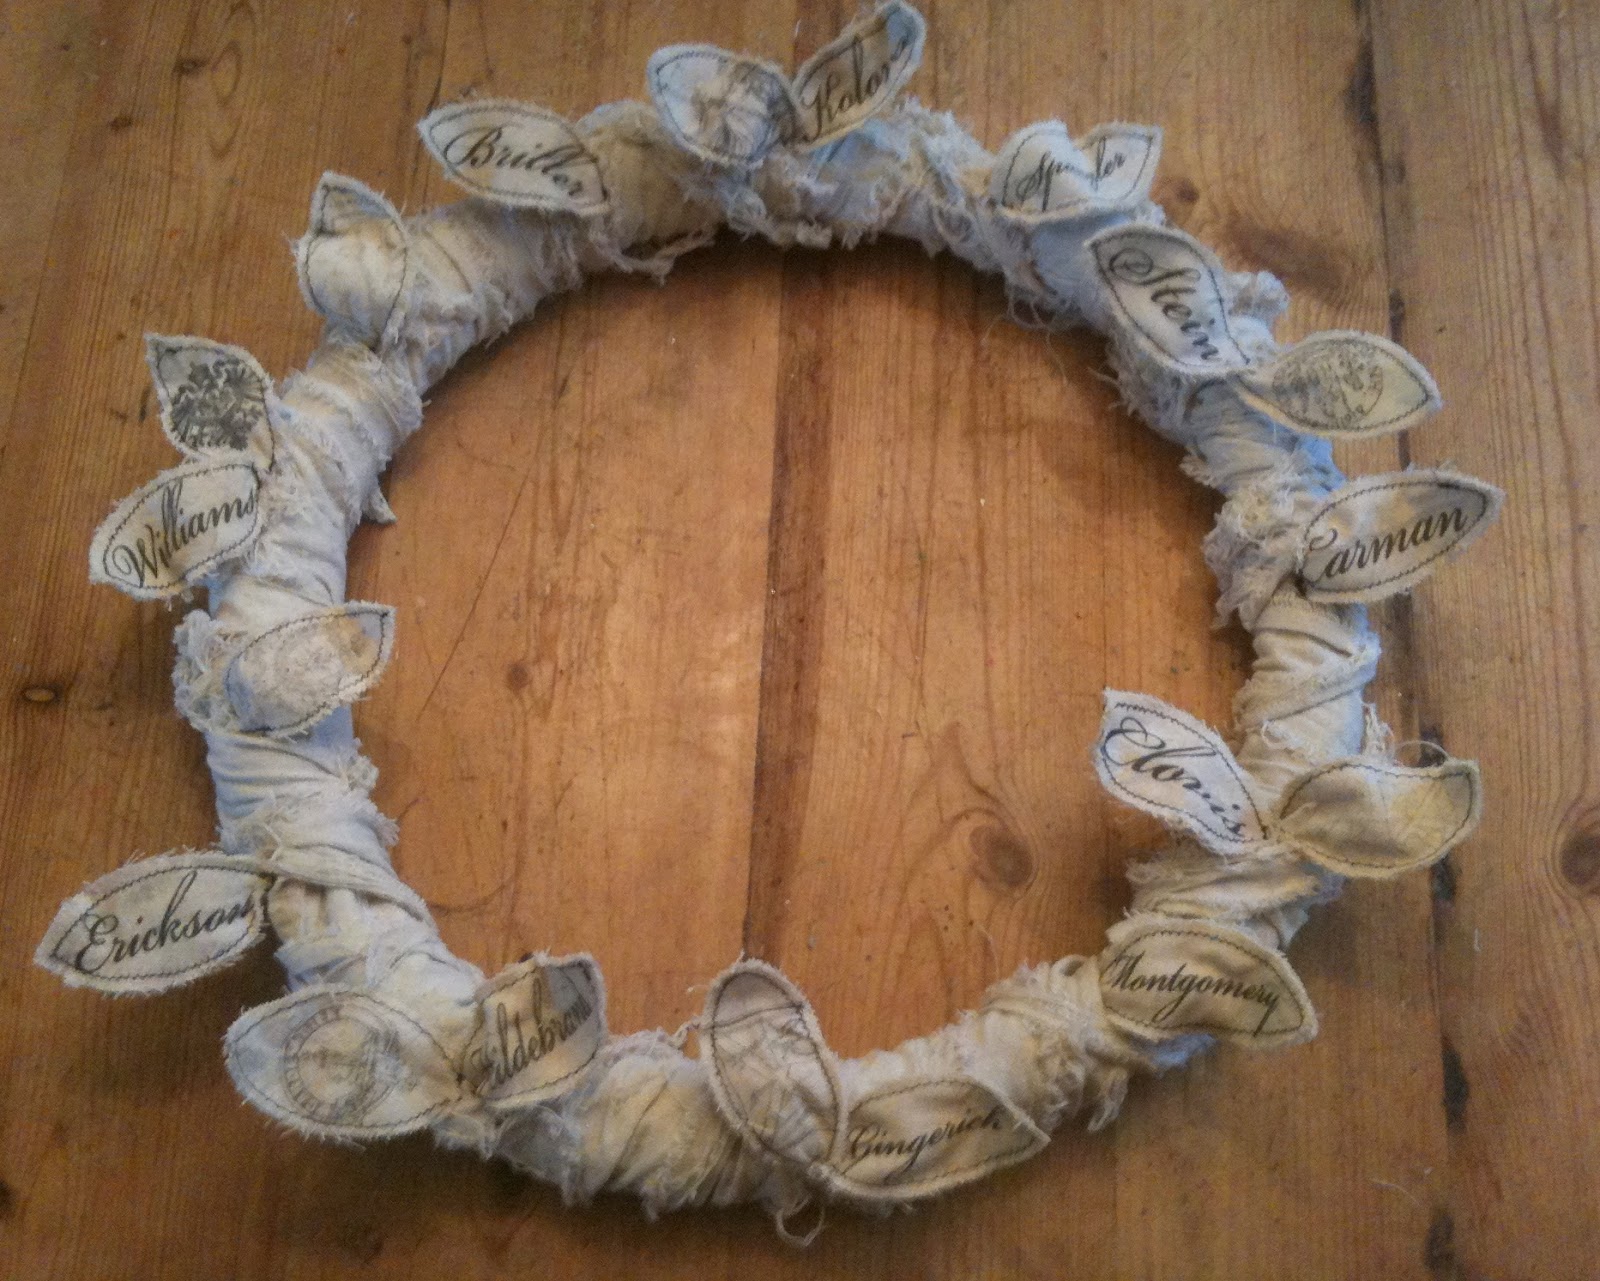
Step 1: Create printable fabric sheets by ironing a sheet of freezer paper to your drop cloth (iron on “dry” setting, dull side of freezer paper facing up). Once paper has fused to fabric, use a piece of copy paper to trace an 8.5″x11 rectangle on the dull side of the paper. Trim along the traced lines with scissors. You can now insert this fabric-paper in to your printer.
Step 2: Download the Leaf Template or create your own. Inside each leaf, print a family name from your heritage. I included both the names of my ancestors and those of my husband in this wreath (I used the font “Beautiful ES”). I also searched the internet for family crests and symbols to include on some of the leaves.
Step 3: Print out your leaves on the printable fabric. Remove paper backing, then cut out each leaf with fabric shears. You will need to print as many blank leaves as you did printed ones, as each leaf consists of two pieces. I recommend making approx. 20 leaves (requiring a total of approx. 40 pieces).
Step 4: Cut enough 6″ pieces of wire so that you have enough wire “stems” for each complete leaf. Run a strip of tacky glue down the center of one blank leaf. Put wire in place. Cover with a printed leaf. This will help hold all the pieces together while you sew.
Step 5: Using black thread and a zigzag stitch, sew around the leaves.
Step 6: Wire the leaves in to place on the wreath form (sorry, not pictured below).
Step 7: Cut canvas drop cloth in to 4 strips (approx. 15′ x 4″). Wash in warm water, then toss in the dryer. Here’s a before & after shot:
Step 8: Wrap the frayed canvas strips around the wreath form. Slightly overlap each end to hold the loose ends in place (you can later secure these with hot glue). Wrapping after the leaves have been wired to the form will help hold the leaves firmly in place.
Step 9: Prepare the vintage reproduction photos by printing Sheet 1, Sheet 2, and Sheet 3 on plain copier paper. Spray an 8.5″x11″ piece of heavy cardboard/chipboard with adhesive and gently lay one of the copies on top, being sure to work out any air bubbles. Repeat with remaining copies.
Step 10: Using scissors or an X-acto knife, cut out the frames. On a cutting mat, use the X-acto knife to cut the centers from the frames.
Step 11: Antique the edges & corners of the frames by pressing and dabbing along the Distress Ink pad. To antique the inside edges of the frame, dab your finger on the ink pad, then run along the inside edges of the frames.
Step 12: Decide which family photos you’d like to see in which frames. Scan and resize (if necessary). Then print and cut out. Use Scotch tape or a glue stick to adhere photos to the frames.
Step 13: Set matted photos in place, without glue, until you’ve achieved the desired layout. When satisfied with your design, hot glue the photos in place.
Step 14: Because the leaves are wired, you can bend and twist them to give them more character and dimension.
Read more at *Rook No. 17: recipes, crafts & creative nesting*
Source:
Before It’s News® is a community of individuals who report on what’s going on around them, from all around the world.
Anyone can join.
Anyone can contribute.
Anyone can become informed about their world.
"United We Stand" Click Here To Create Your Personal Citizen Journalist Account Today, Be Sure To Invite Your Friends.
LION'S MANE PRODUCT
Try Our Lion’s Mane WHOLE MIND Nootropic Blend 60 Capsules
Mushrooms are having a moment. One fabulous fungus in particular, lion’s mane, may help improve memory, depression and anxiety symptoms. They are also an excellent source of nutrients that show promise as a therapy for dementia, and other neurodegenerative diseases. If you’re living with anxiety or depression, you may be curious about all the therapy options out there — including the natural ones.Our Lion’s Mane WHOLE MIND Nootropic Blend has been formulated to utilize the potency of Lion’s mane but also include the benefits of four other Highly Beneficial Mushrooms. Synergistically, they work together to Build your health through improving cognitive function and immunity regardless of your age. Our Nootropic not only improves your Cognitive Function and Activates your Immune System, but it benefits growth of Essential Gut Flora, further enhancing your Vitality.

Our Formula includes:
Lion’s Mane Mushrooms which Increase Brain Power through nerve growth, lessen anxiety, reduce depression, and improve concentration. Its an excellent adaptogen, promotes sleep and improves immunity.
Shiitake Mushrooms which Fight cancer cells and infectious disease, boost the immune system, promotes brain function, and serves as a source of B vitamins.
Maitake Mushrooms which regulate blood sugar levels of diabetics, reduce hypertension and boosts the immune system.
Reishi Mushrooms which Fight inflammation, liver disease, fatigue, tumor growth and cancer. They Improve skin disorders and soothes digestive problems, stomach ulcers and leaky gut syndrome.
Chaga Mushrooms which have anti-aging effects, boost immune function, improve stamina and athletic performance, even act as a natural aphrodisiac, fighting diabetes and improving liver function.
Try Our Lion’s Mane WHOLE MIND Nootropic Blend 60 Capsules Today. Be 100% Satisfied or Receive a Full Money Back Guarantee. Order Yours Today by Following This Link.


