
Incandescent light bulbs have lit the world since the late 1800s, and for just as long a light bulb’s journey has ultimately led to the waste bin. Every year, Americans throw away more than a billion of these miraculous little orbs of glass, inert gas and tungsten filament.
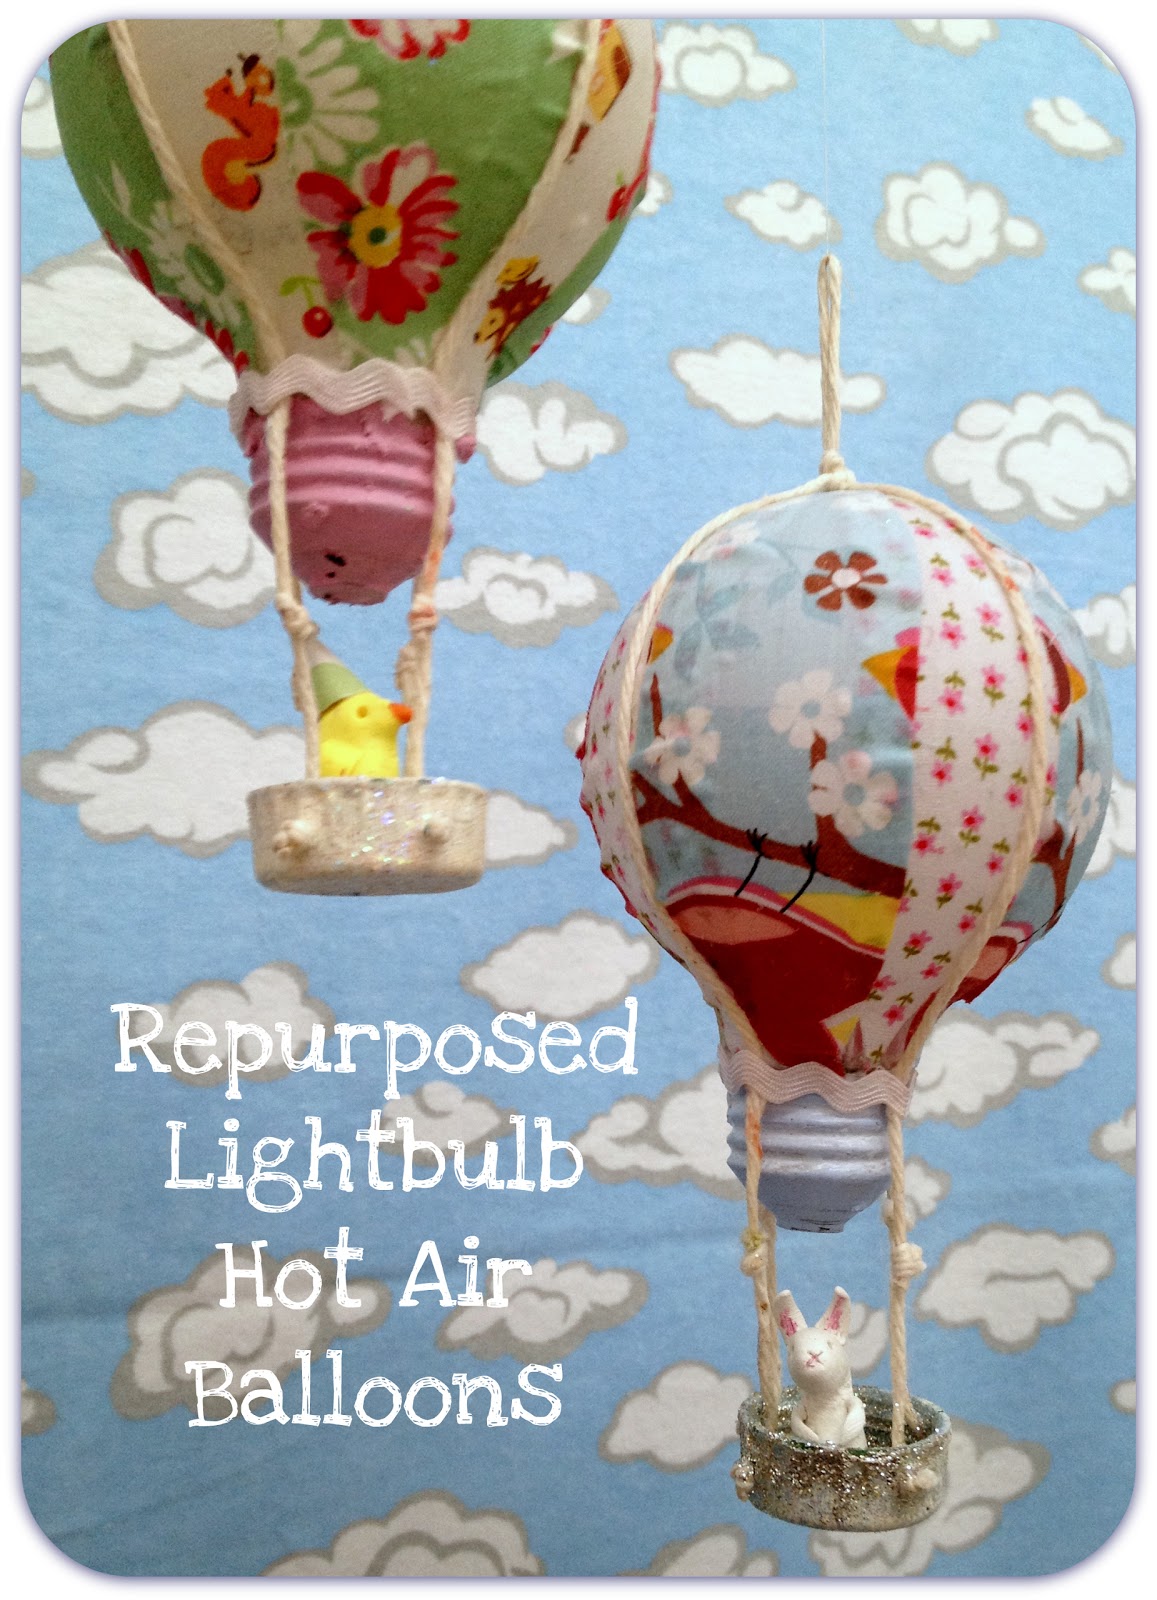
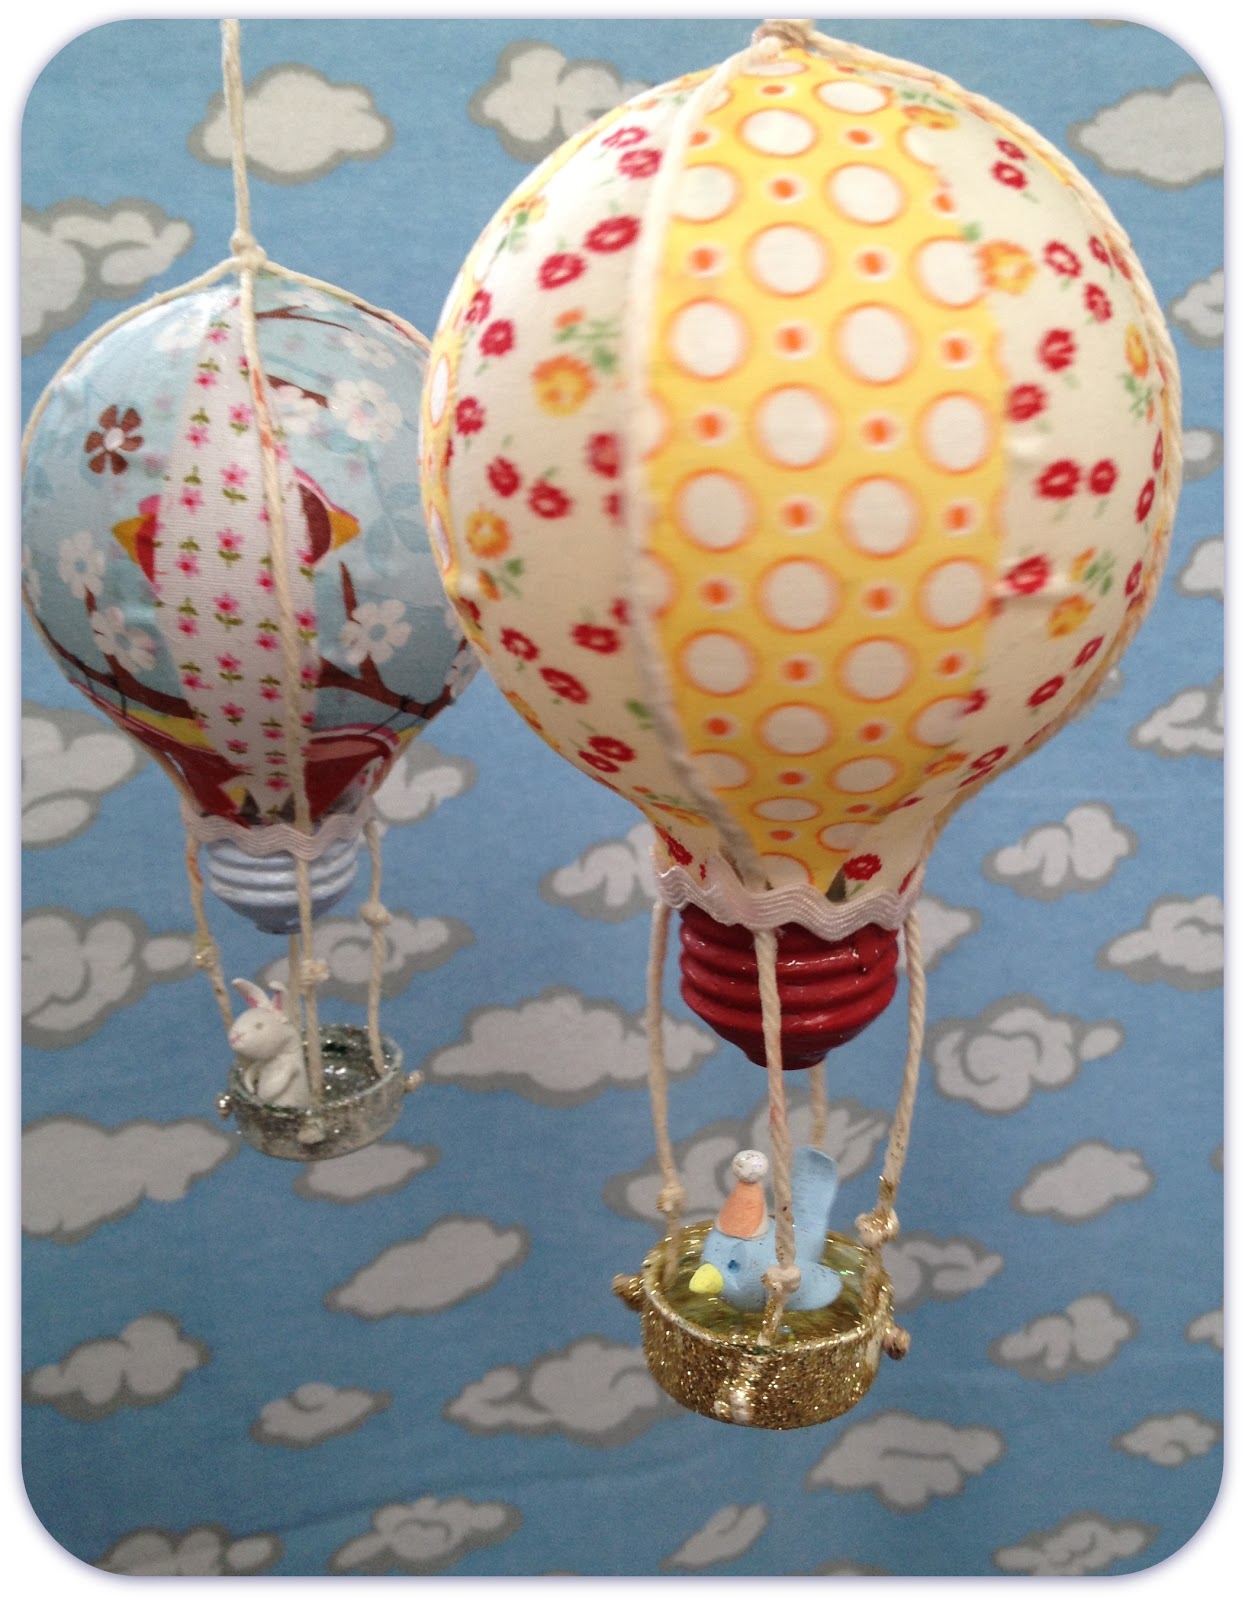
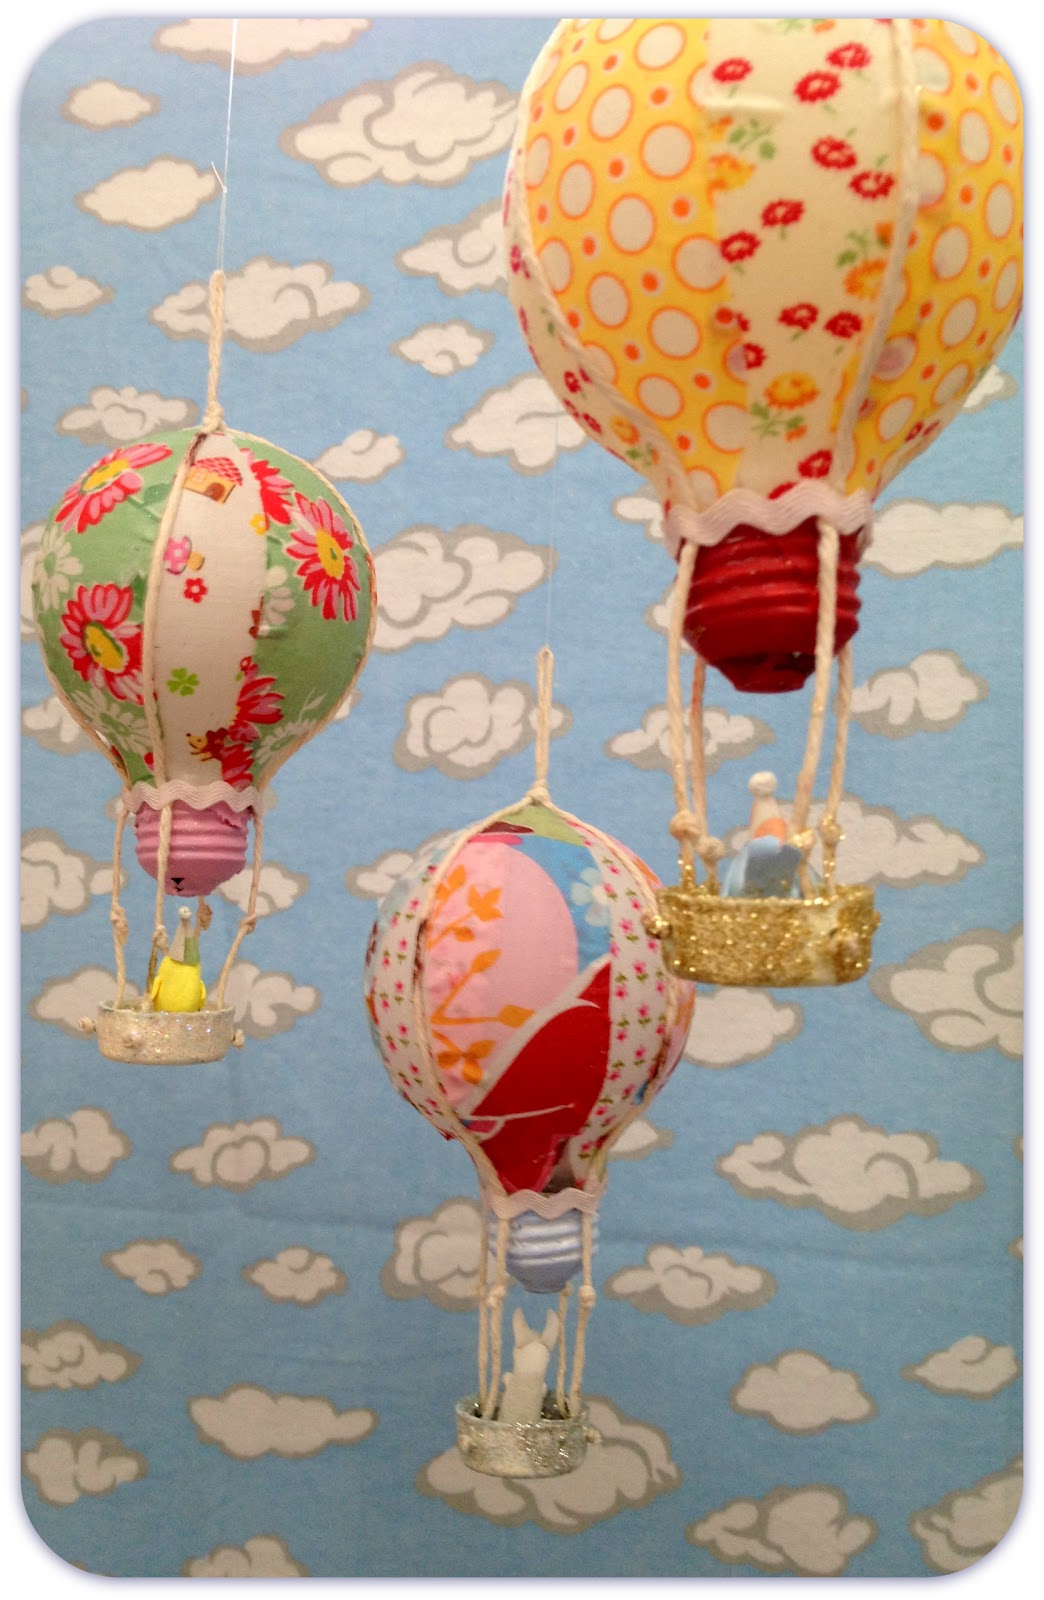
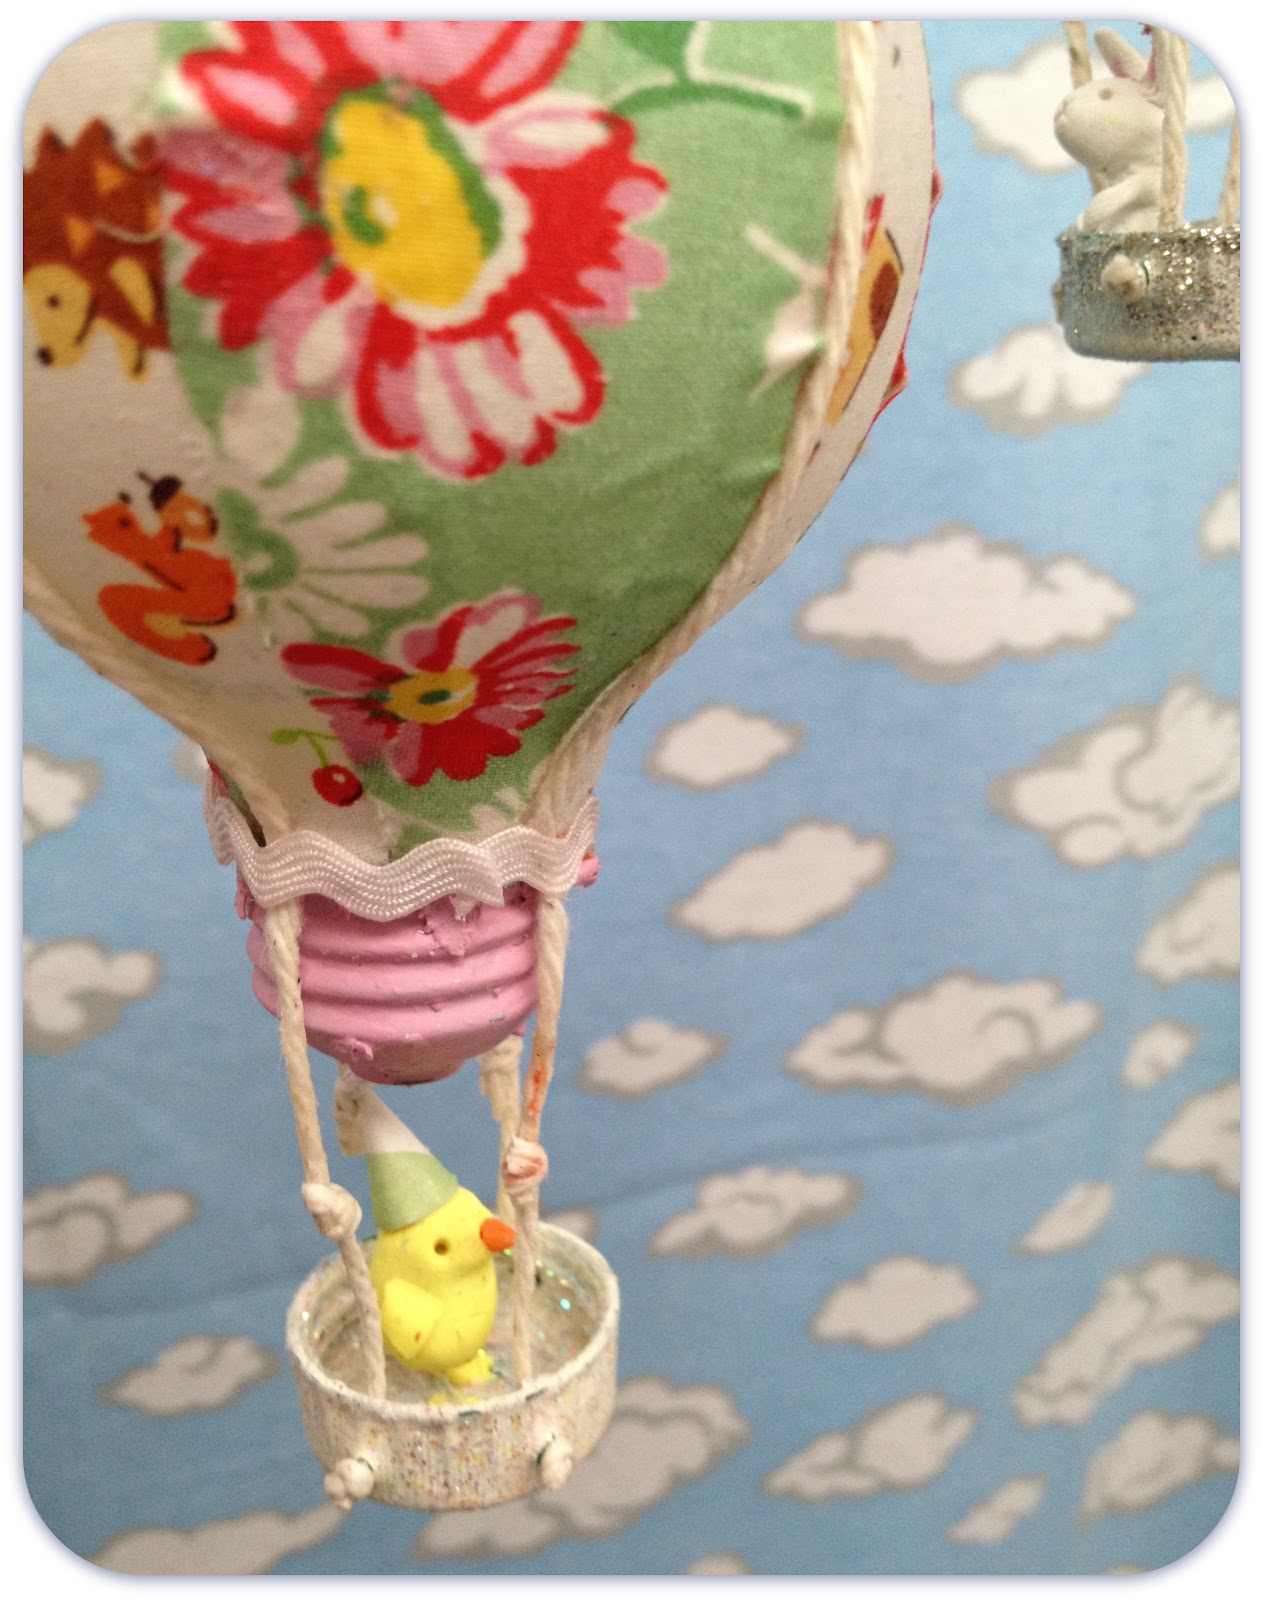
Recently I came across a brilliant little sculpture by artist Souther Salazar on Pinterest. Titled “Lightbulb Balloon (orange)” the piece uses an incandescent bulb as the basis to create a whimsical hot air balloon. Genius!
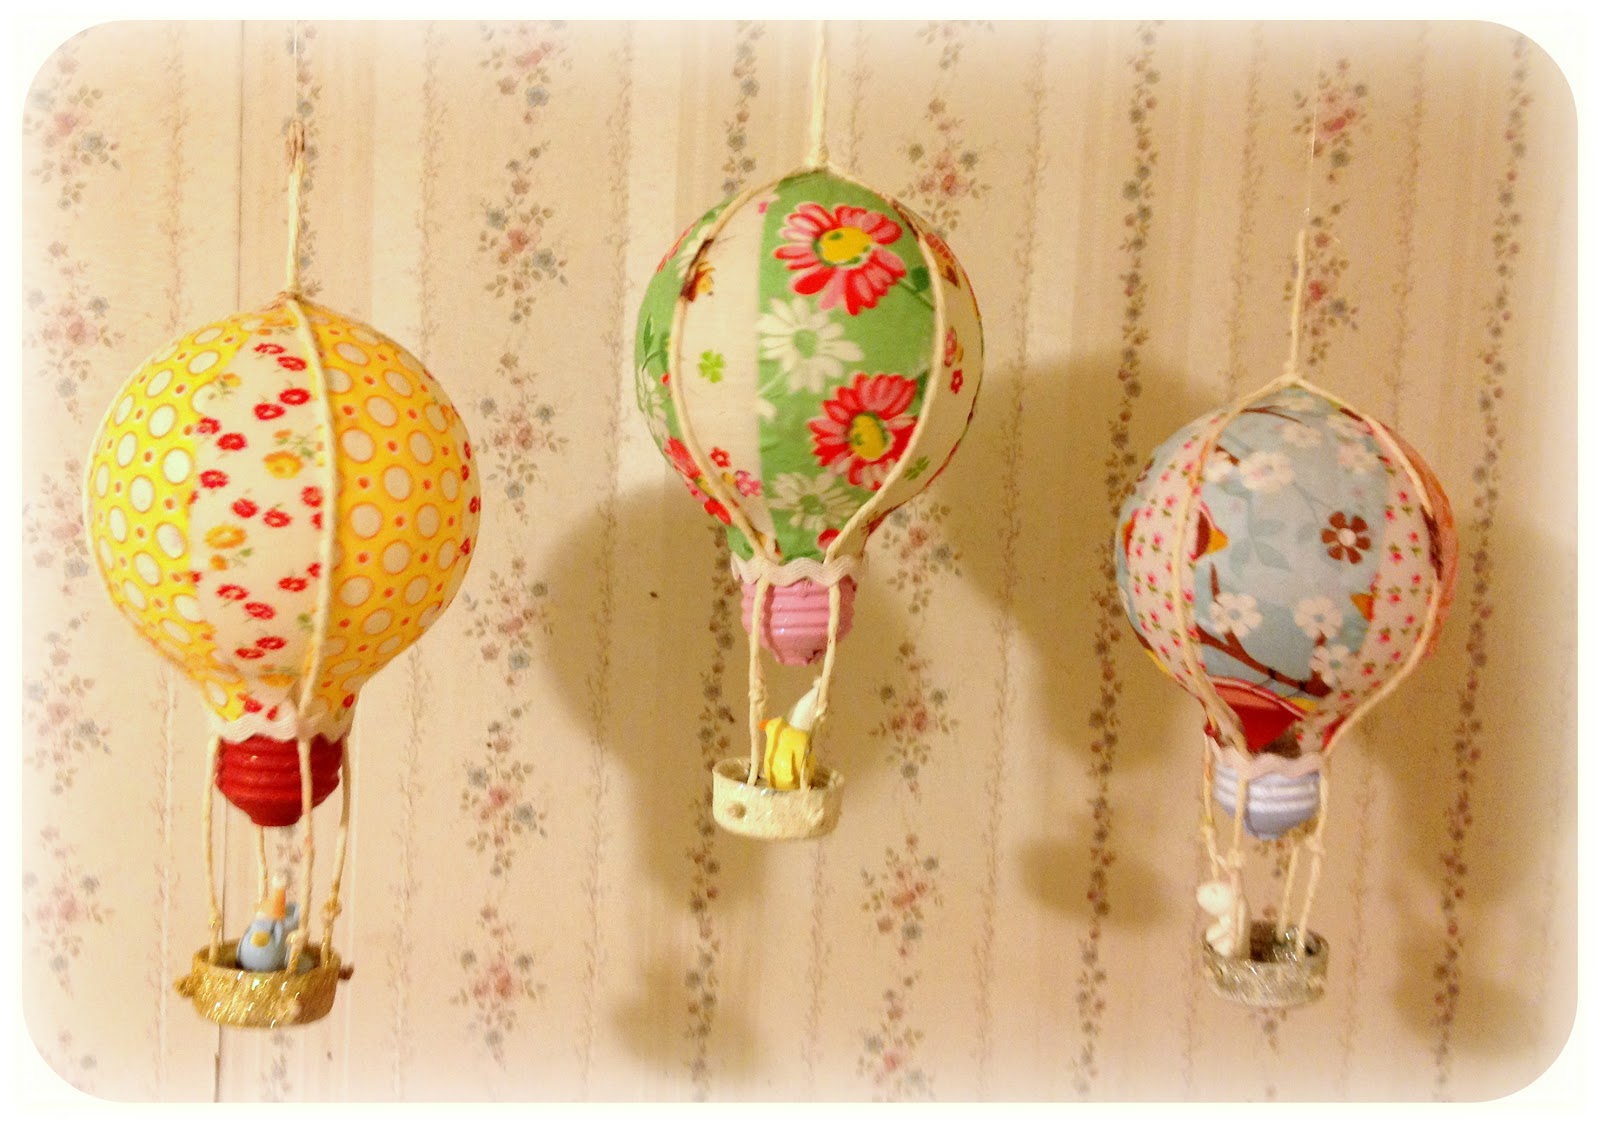
For my part in this week’s Elmer’s Glue ‘n Glitter project for Collective Bias, I took my inspiration from Salazar’s work and created a sweet and simple trio of light bulb balloons of my own.
What I love most about this project is that it repurposes items that might otherwise be destined for the trash: water bottle caps, light bulbs, and fabric and trim scraps. My cost for this project was under a dollar.
Next time a lightbulb in your home emits its last dying flicker, don’t toss it — transform it!
Here’s how…
Hot Air Balloon DIY
MATERIALS
Fabric Scraps
Burned-out Light bulb, any size
|
| My only cost for this project: A bottle of versatile and reliable glue, purchased at Walmart for just $2.47. |
|
| These are my all-time favorite, go-to scissors! They’re only $6 at Walmart and outperform my expensive fabric shears. They cut easily through four pieces of fabric and are versatile for all types of crafting. Perfect for every task in this project. |
String, yarn or twine
Acrylic Paint
Wide-mouthed bottle (for drying rack)
Ribbon or ric-rac scraps
Plastic water bottle cap
An awl and a bamboo skewer
Glitter
Small plastic animal
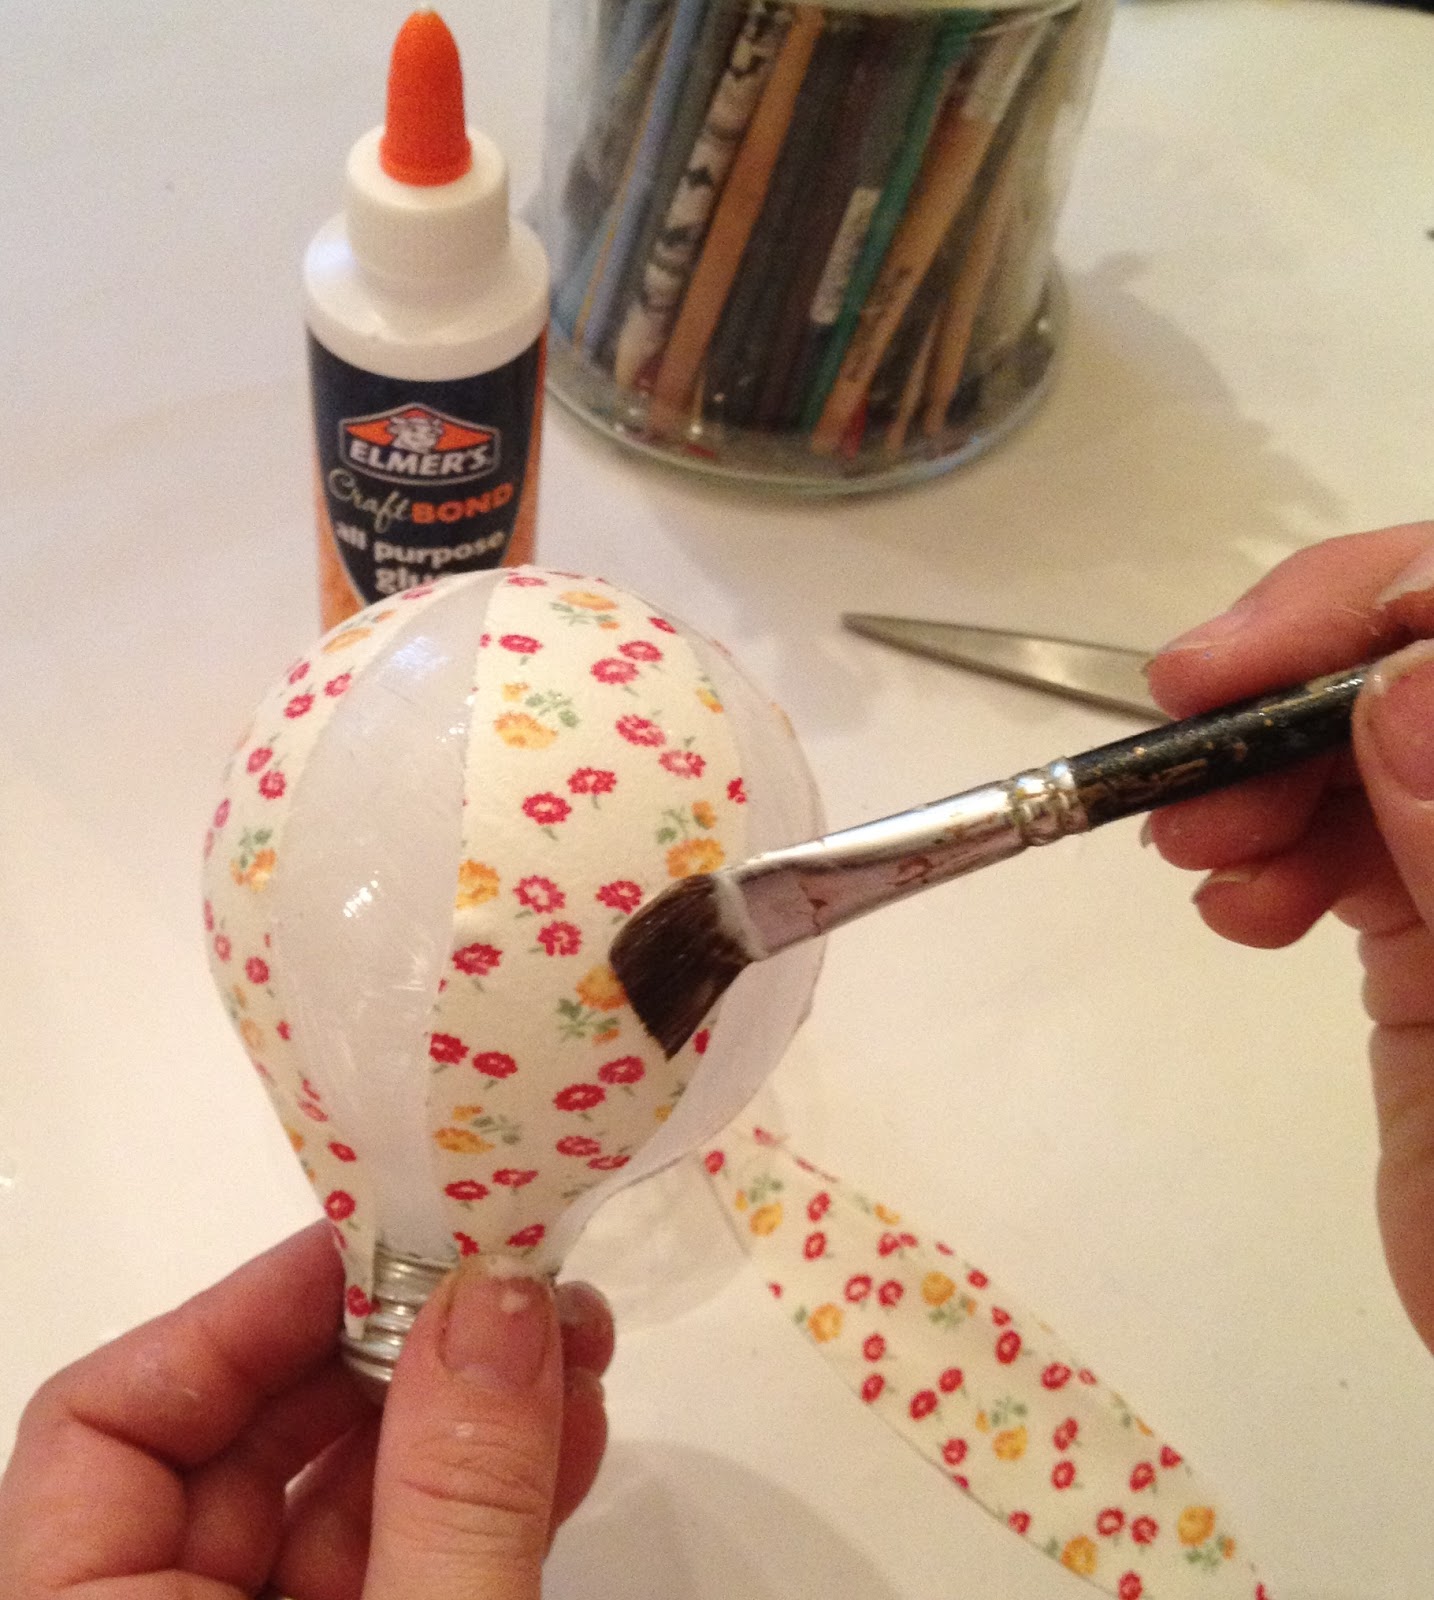
Step 1: Pour a Tablespoon of all purpose glue in a small bowl and thin out with a teaspoon of water. This creates a perfect decoupage medium.
Step 2: Measure light bulb from the center of the top to the line where the glass meets the metal base. Cut four petal-shaped pieces of fabric to that length. Cut another four petal-shaped pieces in a coordinating fabric. The X-ACTO 8″ scissors cut through four pieces of cotton fabric with ease and precision. Love them!
Step 3: Using a small flat paintbrush, brush thinned glue on a portion of the bulb (where you’ll place the first petal of fabric). Set fabric petal in place and brush glue on top. Use the brush to push out any air bubbles or wrinkles. Continue with a second fabric petal on the opposite side. Glue remaining fabric petals in place on the left and the right. There should be a petal-shaped gap in-between each piece. TIP: Start by gluing the lighter colored fabric in place.
Step 4: Repeat with the darker fabric petals.
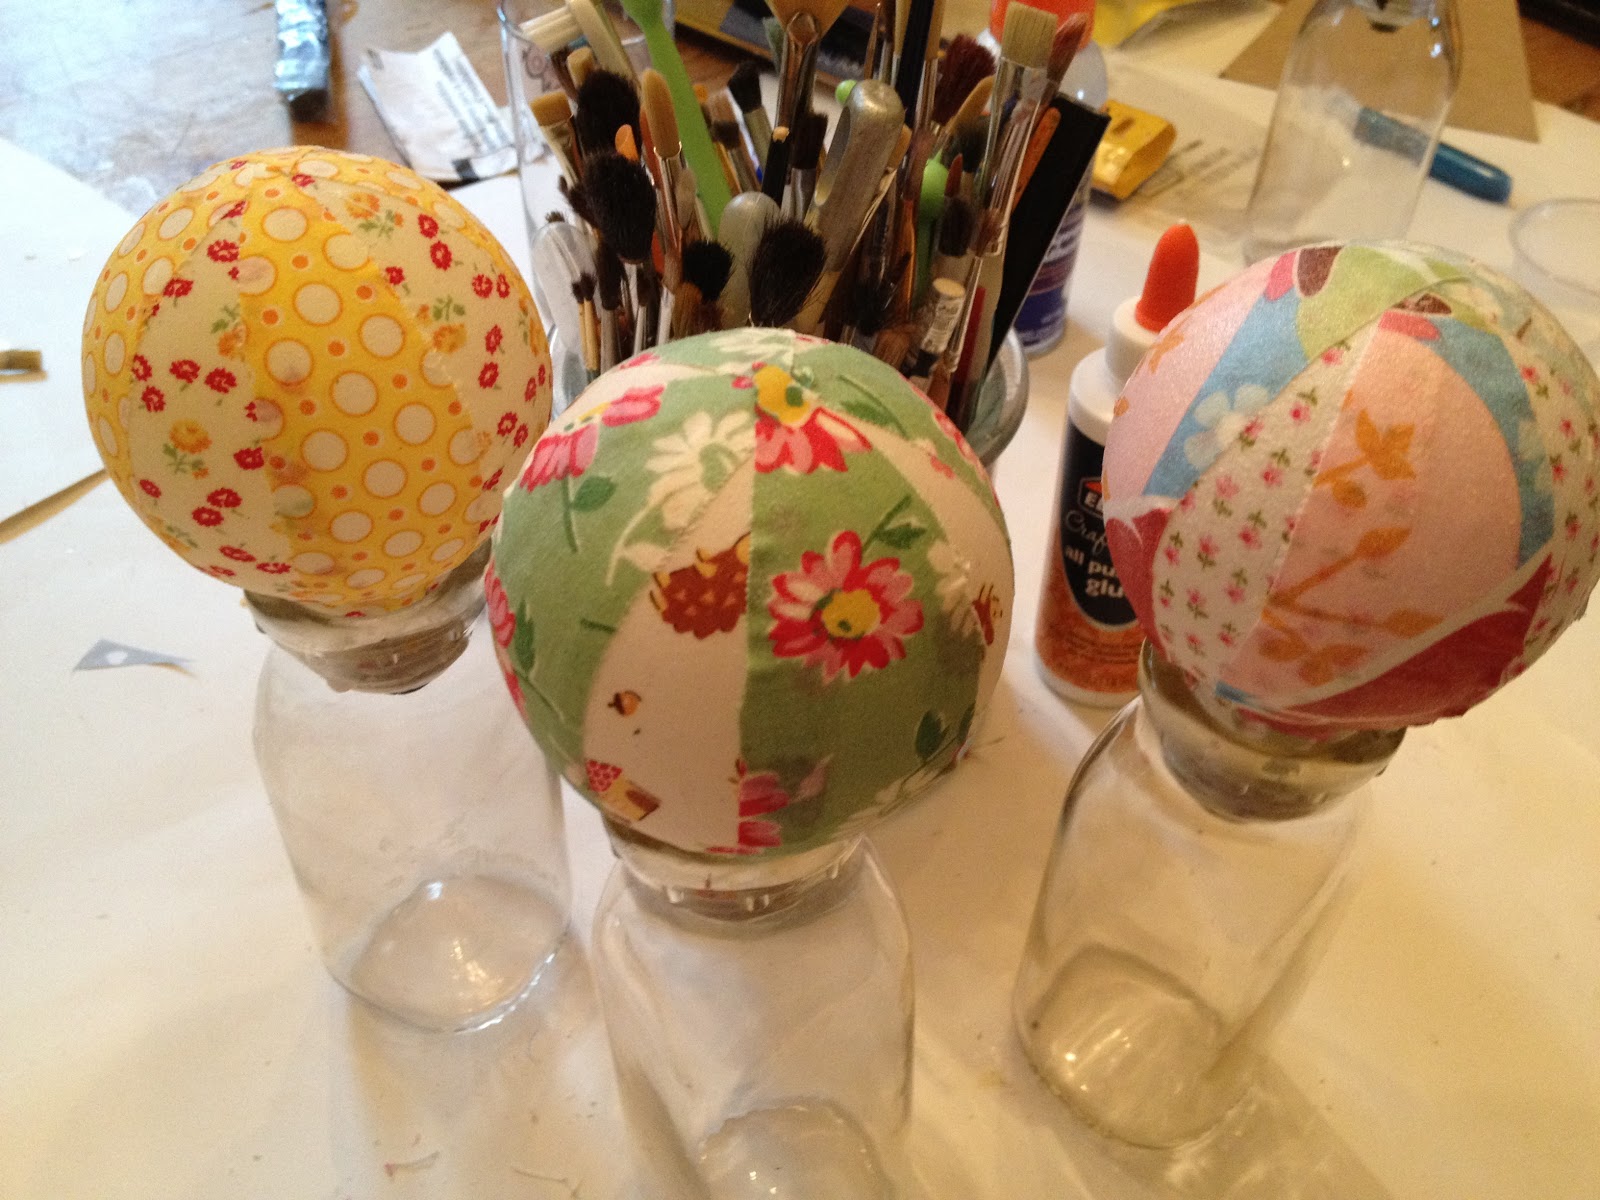
Step 5: Set in a wide-mouthed bottle to dry for at least 1/2 and hour. After 1/2 and hour, flip lightbulb upside-down and dry for another 1/2 hour.
Step 6: While the bulb is drying, use an awl or sharp pointed tool to poke four holes evening around the plastic cap.
|
| I learned by trial and error that it’s better to paint and glitter after the holes are made. |
Step 7: Widen the holes by running a bamboo skewer all the way through.
Step 8: Apply a base color of acrylic paint to the cap. I used ivory. Paint outside, then dry. Paint inside, then dry.
Step 9: Brush outside of cap with glue (not the diluted batch), then dust with glitter. Dry. Repeat on the inside of cap.
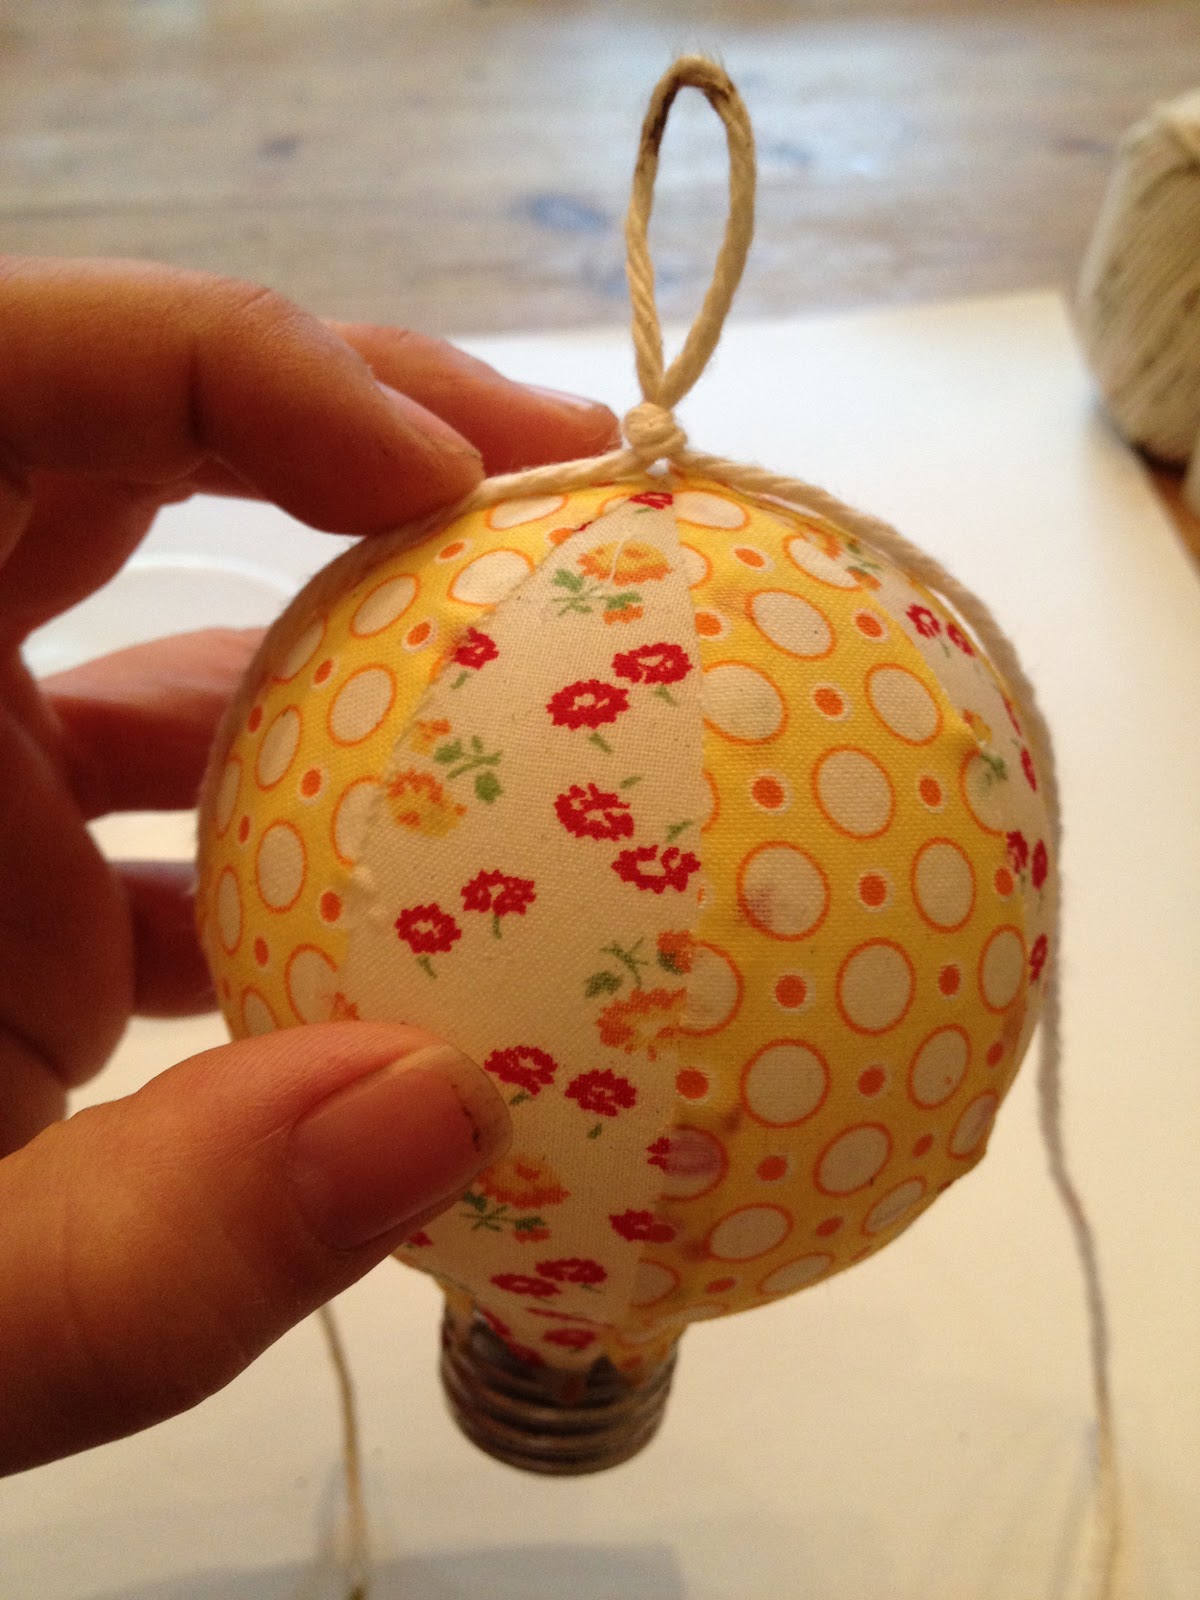
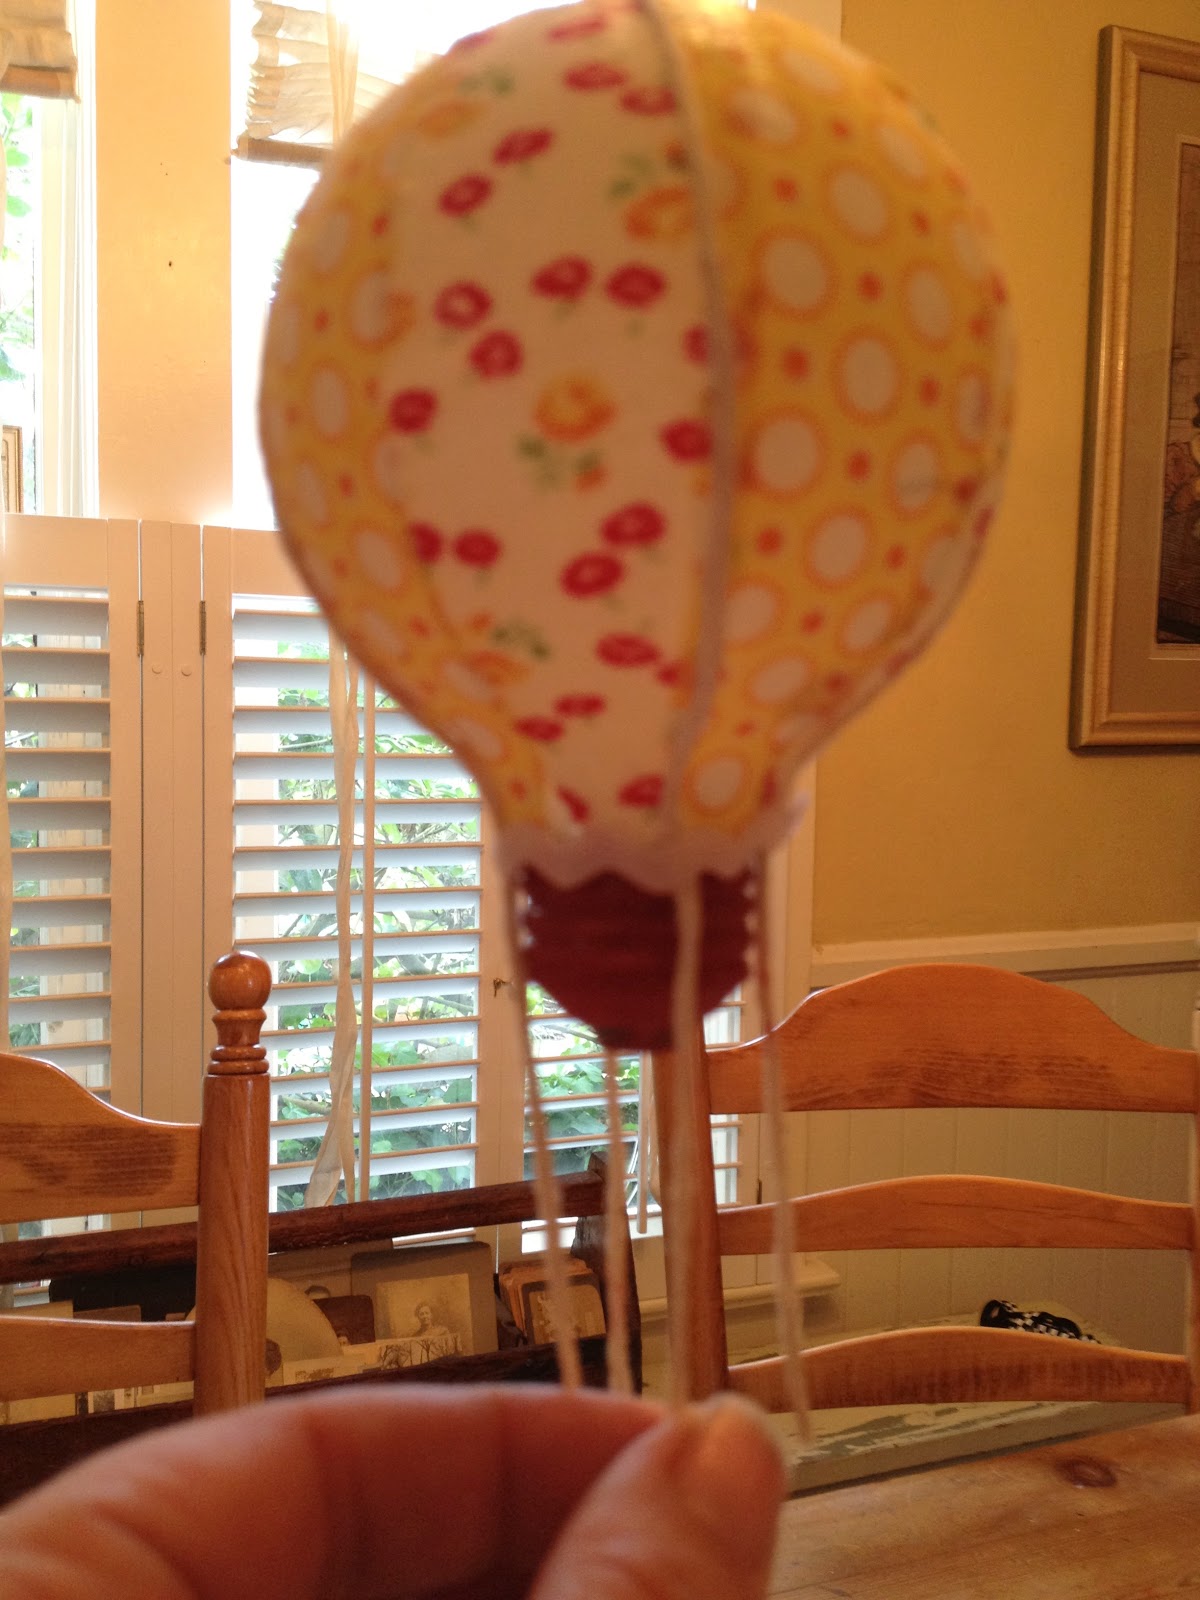
Step 10: Cut two lengths of string. (Height of the bulb x 2 plus 12 inches)
Step 11: Tie a loop in one of the pieces of string.
Step 12: Hold loop in place at the top of the bulb. Brush non-diluted glue on the string, taking care to line-up either side with the seams of the fabrics.
Step 13: Tie the second piece of string around the top knot.
Step 14: Brush glue on the remaining strings, all the way down to the line where the bulb meets the metal base.
Step 15: Dry upside-down. While the glue is drying, paint the metal base of the bulb with a complimentary acrylic color. Dry.
Step 16: Use non-diluted glue to set a piece of ribbon or ricrac in to place around the neck of the bulb.
Step 17: Using your forefinger and thumb, rub some glue on each piece of dangling string. Twist ends slightly to make them easier to pass through the holes in the cap “basket”. Let dry for a few minutes.
TIP: I found it easiest to hang the bulb for this next part. I
looped an extra piece of string through the loop and tied it to my
chandelier.
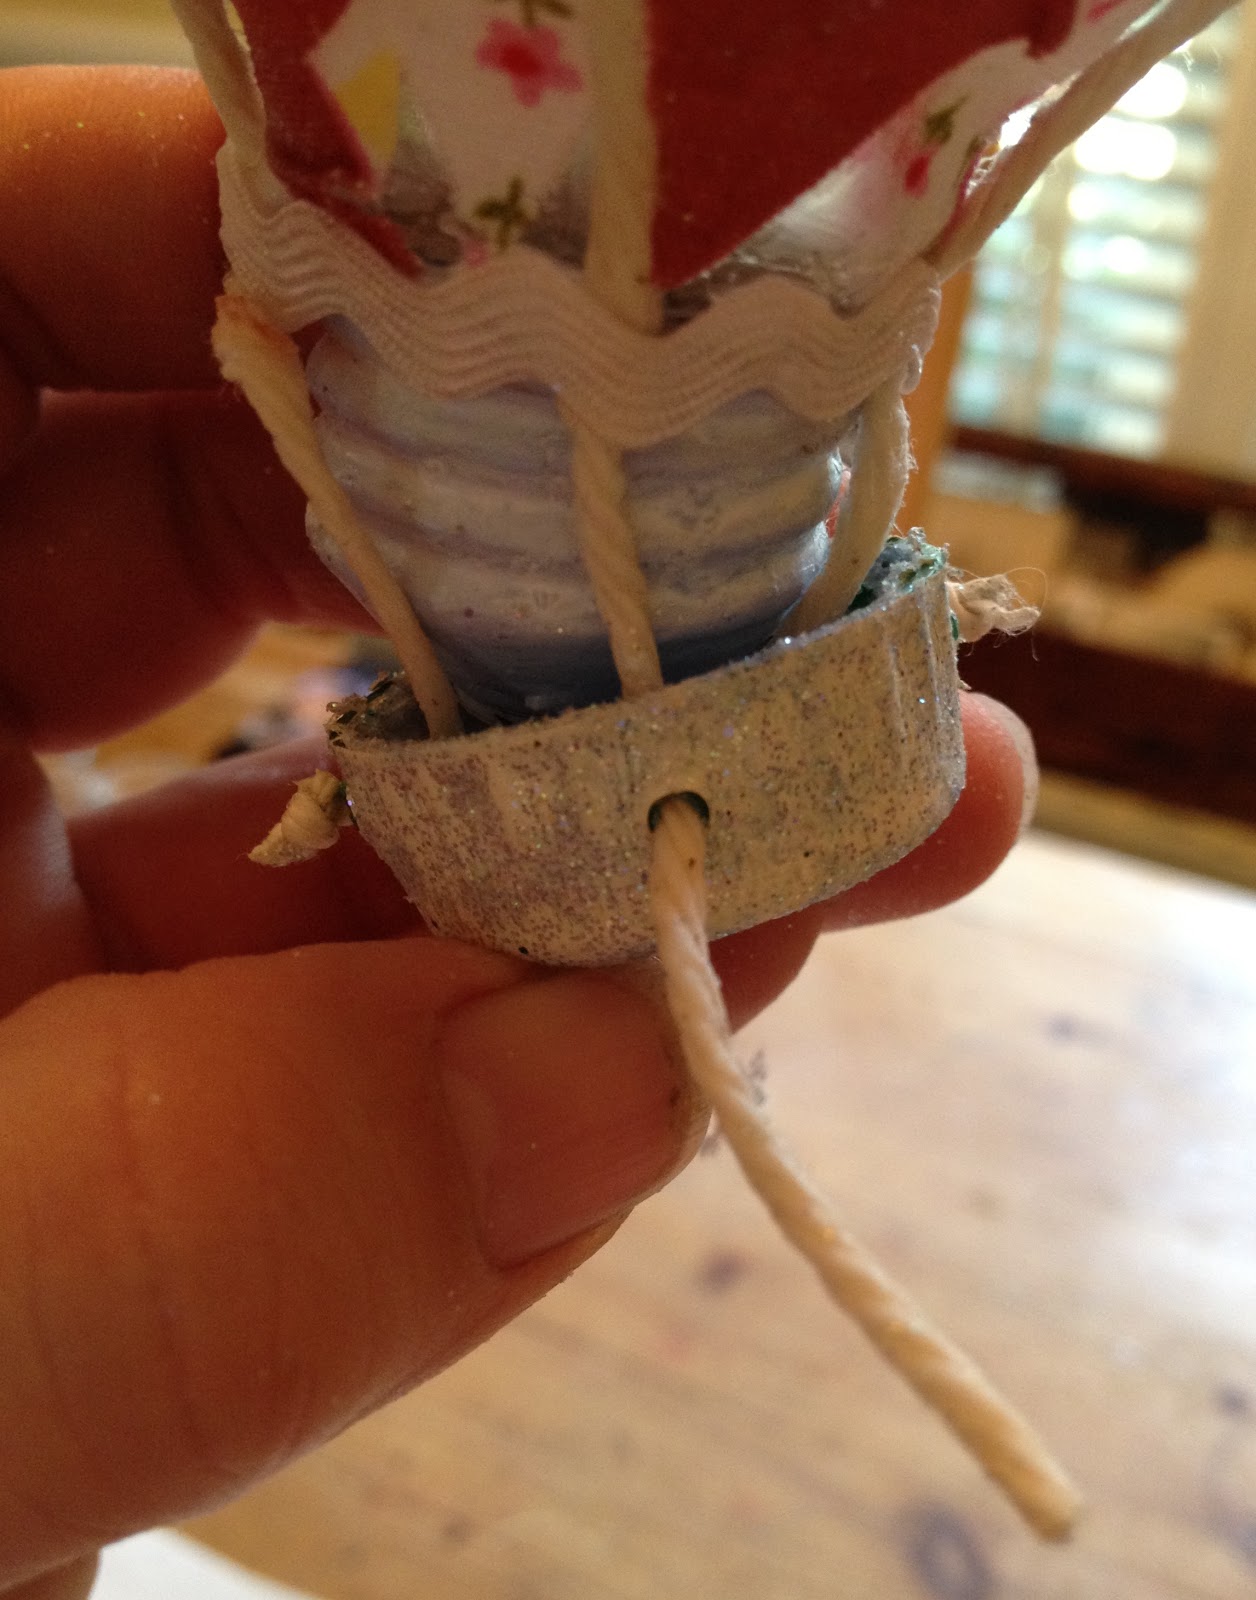
Step 18: Thread the stiffened string through one of the holes in the cap “basket”. Tie a knot in the end. Repeat with the string on the opposite side, taking care to tie the strings evenly so the basket will be level. Repeat with remaining strings. Trim excess string off of each knot.
|
| My string was way too short on the first attempt. Your string will be much longer, giving you the flexibility of deciding how high or low you want the basket to hang. |
Step 19: Glue a small plastic or polymer animal inside the basket.
Step 20: Hang balloon with clear elastic string.
Up, up and away!
—————————————
This shop has been compensated as part of a social shopper insights study for Collective Bias. All opinions are my own. I genuinely recommend the Elmer’s products used in this project. #CBias #GluenGlitter
Read more at *Rook No. 17: recipes, crafts & creative nesting*
Source:
Please Help Support BeforeitsNews by trying our Natural Health Products below!
Order by Phone at 888-809-8385 or online at https://mitocopper.com M - F 9am to 5pm EST
Order by Phone at 866-388-7003 or online at https://www.herbanomic.com M - F 9am to 5pm EST
Order by Phone at 866-388-7003 or online at https://www.herbanomics.com M - F 9am to 5pm EST
Humic & Fulvic Trace Minerals Complex - Nature's most important supplement! Vivid Dreams again!
HNEX HydroNano EXtracellular Water - Improve immune system health and reduce inflammation.
Ultimate Clinical Potency Curcumin - Natural pain relief, reduce inflammation and so much more.
MitoCopper - Bioavailable Copper destroys pathogens and gives you more energy. (See Blood Video)
Oxy Powder - Natural Colon Cleanser! Cleans out toxic buildup with oxygen!
Nascent Iodine - Promotes detoxification, mental focus and thyroid health.
Smart Meter Cover - Reduces Smart Meter radiation by 96%! (See Video).


