
DIY Bathroom Vanity How To


Find out how you can make your very own bathroom vanity with these awesome plans. I love how theirs turned out.
Submitted By: The Quaint Cottage
My name is Karen and I’ve been learning DIY since I was a child working around the house with my dad. He and I would sit around on Saturday evening to catch the latest installment of This Old House. So to say I like DIY is kind of an understatement. I took drafting classes in high school because from the age of eight I used to draw house plans for fun. I would even spend my allowance on those books with hundreds of house plans. I think at one point I had every copy of every floor plan imaginable. I gave up on my plans to be an architect when I went to college, but home detail and design are still a big part of my life. I even play that Sims game on the computer building the houses for my kids so their characters have the best house on the street.
When I first started the blog last summer, it was so my friends and family could get the details on my latest projects so I didn’t have to try to explain them individually. Also, after I realized how big of a blogging world there was with all the other moms out there recreating beautiful houses on a budget, it kind of sparked my creativity and brought more ideas.
My husband and I have lived in our builder grade home for the past twelve years with our four kids. We had to compromise on building this house. I wanted an old house (charm, character), he wanted new construction (no asbestos, new electric & plumbing). Needless to say, he won. However, that meant I could do whatever I wanted with the house to make it love charming like the old house.
Over the years I’ve installed 2,000+ square feet of travertine, ceramic and wood flooring (now I’m happy to say I’m carpet and vinyl free). I gutted the kitchen and installed cabinets, counters, backsplash and lighting. I installed (and still am) trim, wainscoting, batten boards and crown moldings. I even think I’ve repainted every room at least five times. I’m a DIY junkie and it is my hobby.
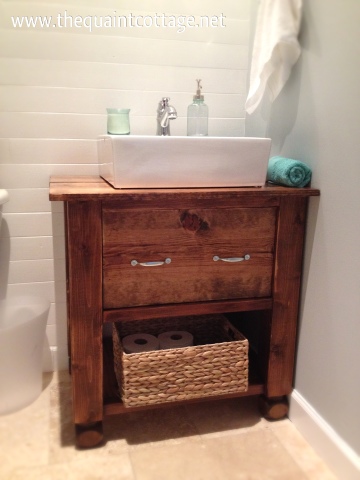
For the half bath project which has the vanity you asked about, it was a project I hadn’t planned on doing at first. Well, actually the half bath was the room in between my freshly finished laundry room and the dining room (which I had planned on working on next to switch into an office). I thought the half bath would stick out like a sore thumb if I didn’t at least give it a new paint job to freshen it up. Well, the paint job made me add a new light overhead to brighten the windowless room. Then I added paneling on the ceiling (I have a phobia of popcorn ceilings and refer to it as the enemy throughout the blog) and the back wall, which helped to cover the holes from running the electrical too. When I was running the electrical, I dropped a tool on the vanity and damaged it. The vanity top was still functional, but the damage gave me a reason to do what I wanted. I built a new vanity base because I wanted a white square sink. I saw the beautiful rustic Pottery Barn vanity and since I’m too thrifty, I decided to recreate it as best I could for my needs. I think the PB vanity was over $1500. I was able to make mine for around $250 (including the sink and faucet).
I used cedar 4”x4” posts for the legs, utility grade shelving boards for the drawer front and side pieces and installed a small open shelve at the base for a basket. The step by step plans and tutorial are on the blog.
Also, another popular post on the blog is the DIY farmhouse table, my knock off Restoration Hardware vase, and my laundry room make over where I made wood countertops and paneled the ceiling.
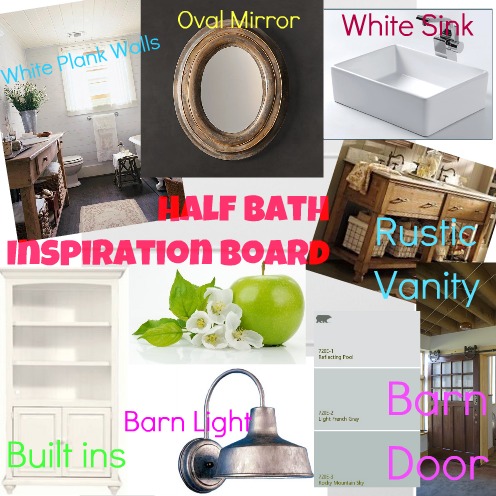
When I started planning my mini half bath make over, I came up with this inspiration board.
As you can see, I installed the white plank wall and ceiling. I added the barn light. And painted the walls the Light French Gray. Here is how far this room has come so far.
Now, I needed a vanity upon which to set the white square sink. I spotted this sink/vanity combo at Pottery Barn and thought it was beautiful. However, it was way out of my budget. Remember, this project began with just the need to repaint the room.
Here is a picture of the inspiration piece:
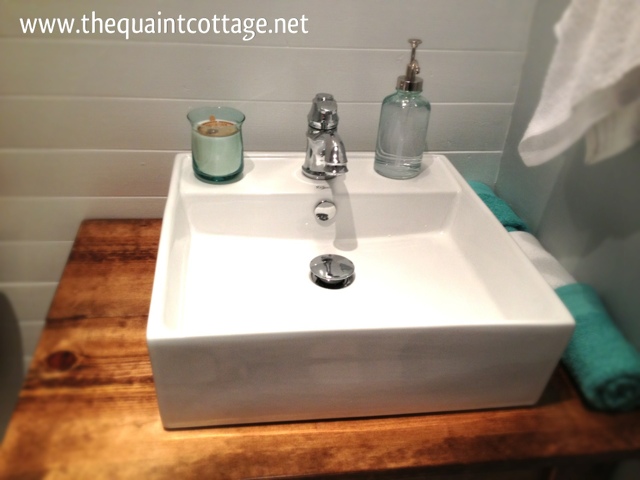
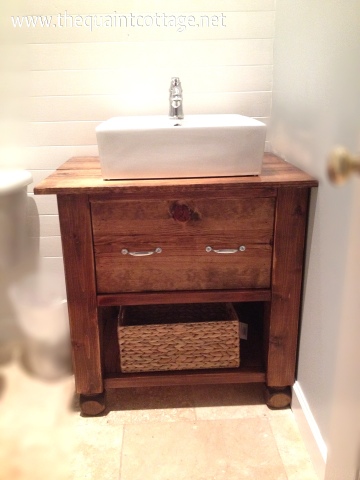
Here is a view of the sink top (which I found at Overstock.com). I found the cute little soap pump at Target and the faucet at Lowes.
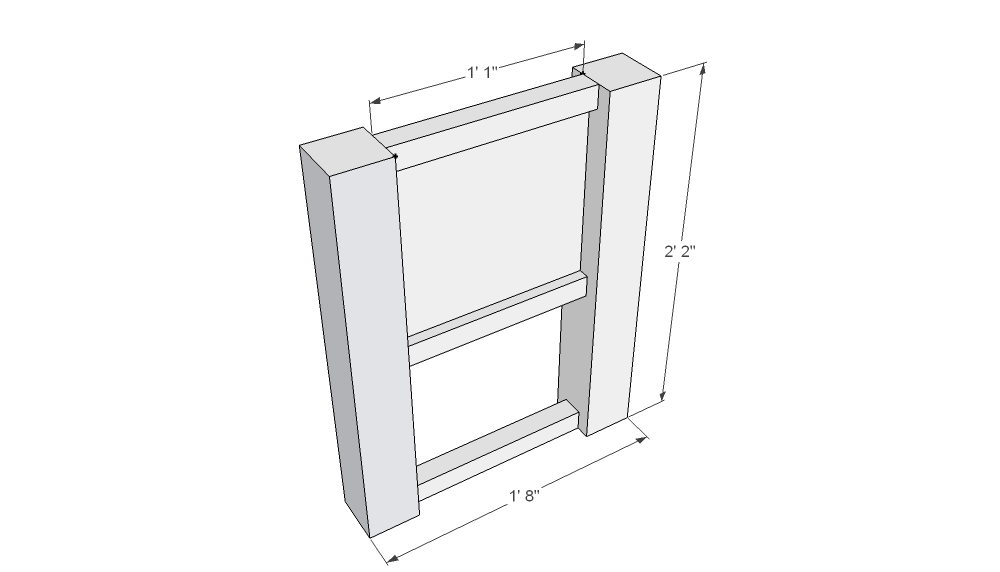
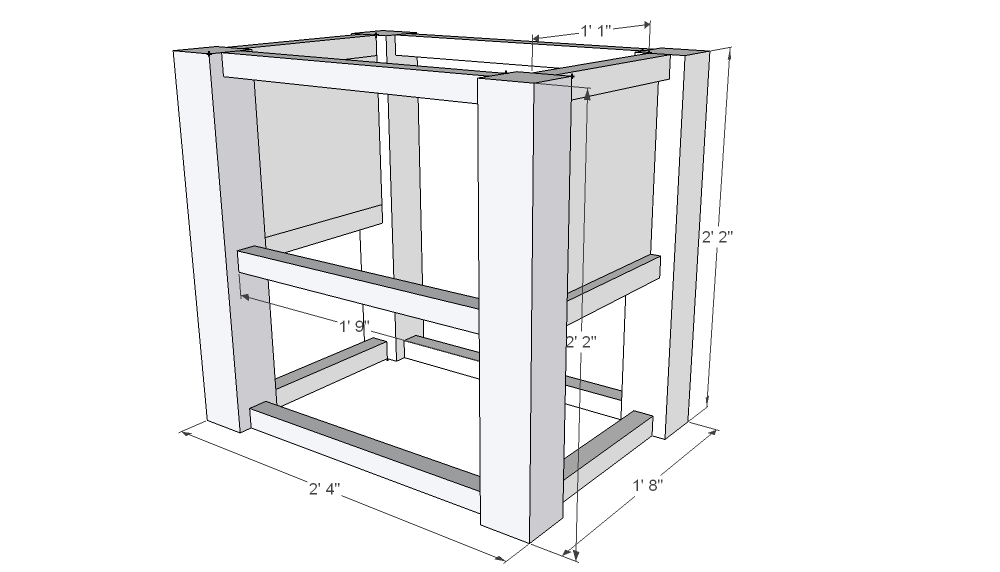
Here is how I built the base:
I used cedar to make the legs and the cross supports, cedar fence post tops for the feet and 1×11.5 utility shelving (which was more rustic, cheaper and aged looking than the pine or white wood).
I would suggest (if you don’t mind the reduced height) to cut the 8′ cedar 4×4 into 4 equal pieces for the legs to save $$$. I had to cut 3 legs on one 8′ piece and the 4th on another. I will use the extra wood for another project, but I thought of it after I already made my cuts. You can make up the difference with taller feet or chunkier top.
Cut List -
4 – 4×4 26″ (legs) may need to adjust for the sink height
4 4″ feet
6 – 2×2 13″ (sides)
2 – 1×12 13″ (sides)
5 – 2×2 21″ (front and back)
1 – 1×12 21″ (front)
2 – 1×12 16″ (bottom shelf)
1 – 2×2 16″ (bottom shelf center)
2 – 1×12 30″ (top)
First, I assembled the two sides by attaching the pieces and face to the legs.
After the two sides were built, I attached the front three support pieces and the two back supports.
Attach the top pieces to the frame of the base with “L” brackets. Once you find the position you like for the sink, mark the openings for the drain and the supply lines.
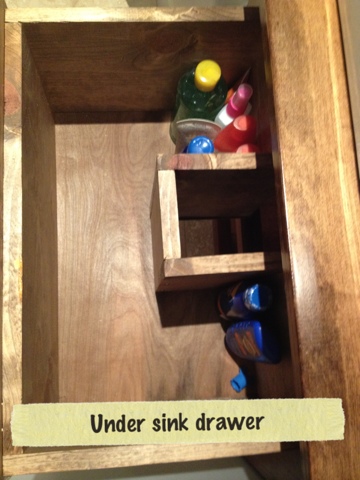
Attach feet and front piece. I made a small “U” shaped drawer to allow a spot for the drain.
The overall height for the sink base is 30.75″ and with the sink it is about 36″. Make necessary adjustments depending on your sink and the height you require.
Faucet-$80
Sink & Drain – $150
Check out these other fun vanities or nightstands:
Source:
Anyone can join.
Anyone can contribute.
Anyone can become informed about their world.
"United We Stand" Click Here To Create Your Personal Citizen Journalist Account Today, Be Sure To Invite Your Friends.
Before It’s News® is a community of individuals who report on what’s going on around them, from all around the world. Anyone can join. Anyone can contribute. Anyone can become informed about their world. "United We Stand" Click Here To Create Your Personal Citizen Journalist Account Today, Be Sure To Invite Your Friends.
LION'S MANE PRODUCT
Try Our Lion’s Mane WHOLE MIND Nootropic Blend 60 Capsules
Mushrooms are having a moment. One fabulous fungus in particular, lion’s mane, may help improve memory, depression and anxiety symptoms. They are also an excellent source of nutrients that show promise as a therapy for dementia, and other neurodegenerative diseases. If you’re living with anxiety or depression, you may be curious about all the therapy options out there — including the natural ones.Our Lion’s Mane WHOLE MIND Nootropic Blend has been formulated to utilize the potency of Lion’s mane but also include the benefits of four other Highly Beneficial Mushrooms. Synergistically, they work together to Build your health through improving cognitive function and immunity regardless of your age. Our Nootropic not only improves your Cognitive Function and Activates your Immune System, but it benefits growth of Essential Gut Flora, further enhancing your Vitality.

Our Formula includes: Lion’s Mane Mushrooms which Increase Brain Power through nerve growth, lessen anxiety, reduce depression, and improve concentration. Its an excellent adaptogen, promotes sleep and improves immunity. Shiitake Mushrooms which Fight cancer cells and infectious disease, boost the immune system, promotes brain function, and serves as a source of B vitamins. Maitake Mushrooms which regulate blood sugar levels of diabetics, reduce hypertension and boosts the immune system. Reishi Mushrooms which Fight inflammation, liver disease, fatigue, tumor growth and cancer. They Improve skin disorders and soothes digestive problems, stomach ulcers and leaky gut syndrome. Chaga Mushrooms which have anti-aging effects, boost immune function, improve stamina and athletic performance, even act as a natural aphrodisiac, fighting diabetes and improving liver function. Try Our Lion’s Mane WHOLE MIND Nootropic Blend 60 Capsules Today. Be 100% Satisfied or Receive a Full Money Back Guarantee. Order Yours Today by Following This Link.


| Visits: | 1,826,428,657 |
| Stories: | 8,679,980 |
Whistler Blowers, Insiders
