Mixing Relief and Intaglio Printmaking Methods


This is a post from Belinda Del Pesco’s Art Blog Belinda Del Pesco.
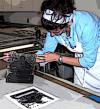
Mixing Relief and Intaglio Printmaking Methods
This mix of relief and intaglio printmaking methods was the second one I worked on last Fall. The project carried some pearl-clutching challenges, so I’ll share them with you in this post.
If you’re interested in trying a printmaking mashup of linocut and drypoint from plexiglass, have a look at the previous posts in this Printmaking Mashup series:
- Reduction Linocut and Drypoint Still Life Print (the first in this series)
- Linocut Print and Drypoint Etching Mashup of a small Room Interior
- Mixed Printmaking – Color Linocut and Drypoint Engraving Portrait of a Girl and a Cat
- Drypoint Etching and Relief Print Mashup of a Windowsill Still Life
Preparing Linoleum for Printing
I get a lot of questions about what I mean by the phrase “prepared linoleum”. To be clear, I print linocut almost exclusively from un-mounted, burlap-backed, traditional battleship gray linoleum. (Like this stuff.)
Linoleum is coated with a sealer after manufacturing to keep the material from drying out and getting crumbly. Sanding the surface of your linoleum plate, with a block and super fine sandpaper (more on sanding linoleum here), to smooth any blemishes or lino-freckles on the plate will lead to better ink application and smoother ink transfer.
I don’t like using Soft-Kut or Speedy-Carve plates, with predominantly rubber ingredients, because they are too flexible to carve fine details.
Also, when registration is part of the printmaking plan – aligning a soft rubber plate to print on top of colors you’ve already printed is a challenge. The rubbery plate flexes under pressure, so the edges of shapes skip across the paper during ink transfer, leaving an infinity mirror trail.
Drying Printmaking Ink
Akua intaglio inks are soy oil-based, and they dry via absorption. If you print on papers that were made with surface or internal sizing which prohibits absorption, you can count on wet prints for a very long time.
This linocut and drypoint print mashup was printed with Akua intaglio ink, adjusted with Mag Mix (magnesium carbonate, to increase viscosity and reduce tack and length), on BFK Rives heavyweight paper.
The inks are at least 12 years old, as is the paper. The only change I’ve seen in the inks over time is a slightly more liquid viscosity, but that can be remedied with modifiers. After spritzing the paper to print the first few layers of linoleum – I observed the paper’s internal sizing had left the building. (Read more about the breakdown of fine art paper sizing and caring for your paper here.)
Ink Absorption vs Evaporation
Most traditional printmaking inks that are oil-based dry quickly via evaporation. In other words, the moisture in the ink dissipates when exposed to air, and the pigments thicken and dry quickly.
Quick-drying inks are the reason we tape the lid on the ink cans and buy a packet of wax paper “skins” to lay over the ink inside the can. We want to prevent air from getting to our unused inks, to prohibit their drying. Once they’re printed to paper, we want them to dry, pronto!
Inks that dry via absorption need to soak into a paper’s pulp to dry. Akua inks can be left out in the air on a glass slab for weeks. The pigments may air-thicken, but they won’t dry till they’re transferred to an absorbent paper surface. This is a great feature when you want to take your time with a monotype print. It also gives you a lot of control once you get acquainted with various printmaking paper’s absorption rates to accelerate your drying time.
Like any relationship, getting acquainted with your inks and paper and printmaking tools works best with some dating and lots of Q&A. You have to get to know each other before you can feel confident about compatibility.
Conclusions
So, I started this project with paper and inks that are a decade old, and the inks required absorption to dry. When you print multiple layers of ink onto age-compromised paper, each layer dries as a barrier, thereby blocking absorption for later color applications.
I knew my paper issue, in particular, would likely cause problems, but I planned to (and did) use a variety of ink-drying methods I read about from other printmakers, including:
- “Blotting” the uppermost (wettest) inks on each print against newsprint via a run through the press
- Setting the prints outside in the sun to “solar bake” the inks into submission
- Separating each print with a sheet of blank printmaking paper and heating the stack on a radiator for a few days to encourage drying
- Hanging each print in the studio with spacers to encourage plenty of airflow around the front and back of the paper/print to assist with “air thickening” the ink. (I did this for 6 months.)
Good Art Links for You
- Speaking of paper, did you know that legion Paper has a YouTube Channel? Learn about Fine Art Papers here.
- Émilie Aizier’s fun tin foil and cola Kitchen Litho Print Biennial is on, with the deadline for Submission set for December 2022.
- If you’re interested in the history or manufacturing of fine art papers, this article on Whatman paper is a fun read.
- On Thursday, April 28th, the Smithsonian is presenting a lecture ($25) on Zoom titled ‘Picturing Women‘. From their website: More than half of the famous artworks on most top-ten lists depict women. But none were made by women. Art historian Heidi Applegate considers the centrality of women as subjects in the history of art, including two of the most well-known examples: Leonardo da Vinci’s Mona Lisa and Botticelli’s Birth of Venus.
Every creative endeavor in the studio is an adventure, and every artistic adventure has surprises, growth, failure, and perspective to carry forward towards future adventures. The most important part of being a creative person is to keep making. Whether it’s 10 minutes or ten hours, throw your fear of failure out the window, and get determined to make some art.
Thanks for stopping by, and I’ll see you in the next post -
Belinda
P.S. This is a thought-provoking essay on whether artists need to use Social media.
Art Quote
May your coming year be filled with magic and dreams and good madness. I hope you read some fine books and kiss someone who thinks you’re wonderful, and don’t forget to make some art — write or draw or build or sing or live as only you can. And I hope, somewhere in the next year, you surprise yourself.
The post Mixing Relief and Intaglio Printmaking Methods appeared first on Belinda Del Pesco’s Art Blog Belinda Del Pesco.
Source: https://www.belindadelpesco.com/mixing-relief-and-intaglio-printmaking-methods.html/
Anyone can join.
Anyone can contribute.
Anyone can become informed about their world.
"United We Stand" Click Here To Create Your Personal Citizen Journalist Account Today, Be Sure To Invite Your Friends.
Before It’s News® is a community of individuals who report on what’s going on around them, from all around the world. Anyone can join. Anyone can contribute. Anyone can become informed about their world. "United We Stand" Click Here To Create Your Personal Citizen Journalist Account Today, Be Sure To Invite Your Friends.
LION'S MANE PRODUCT
Try Our Lion’s Mane WHOLE MIND Nootropic Blend 60 Capsules
Mushrooms are having a moment. One fabulous fungus in particular, lion’s mane, may help improve memory, depression and anxiety symptoms. They are also an excellent source of nutrients that show promise as a therapy for dementia, and other neurodegenerative diseases. If you’re living with anxiety or depression, you may be curious about all the therapy options out there — including the natural ones.Our Lion’s Mane WHOLE MIND Nootropic Blend has been formulated to utilize the potency of Lion’s mane but also include the benefits of four other Highly Beneficial Mushrooms. Synergistically, they work together to Build your health through improving cognitive function and immunity regardless of your age. Our Nootropic not only improves your Cognitive Function and Activates your Immune System, but it benefits growth of Essential Gut Flora, further enhancing your Vitality.

Our Formula includes: Lion’s Mane Mushrooms which Increase Brain Power through nerve growth, lessen anxiety, reduce depression, and improve concentration. Its an excellent adaptogen, promotes sleep and improves immunity. Shiitake Mushrooms which Fight cancer cells and infectious disease, boost the immune system, promotes brain function, and serves as a source of B vitamins. Maitake Mushrooms which regulate blood sugar levels of diabetics, reduce hypertension and boosts the immune system. Reishi Mushrooms which Fight inflammation, liver disease, fatigue, tumor growth and cancer. They Improve skin disorders and soothes digestive problems, stomach ulcers and leaky gut syndrome. Chaga Mushrooms which have anti-aging effects, boost immune function, improve stamina and athletic performance, even act as a natural aphrodisiac, fighting diabetes and improving liver function. Try Our Lion’s Mane WHOLE MIND Nootropic Blend 60 Capsules Today. Be 100% Satisfied or Receive a Full Money Back Guarantee. Order Yours Today by Following This Link.


| Visits: | 1,707,055,070 |
| Stories: | 8,447,112 |
Whistler Blowers, Insiders
