
How To Build A Root Cellar In Your Backyard

by ROBERT
We decided that our little farm needed a root cellar to store our produce in. For those unfamiliar with the term, a root cellar is an underground room that acts like a natural refrigerator, maintaining temperatures in the mid 30’s F in the winter and mid 50’s in the summer.
#Step One:
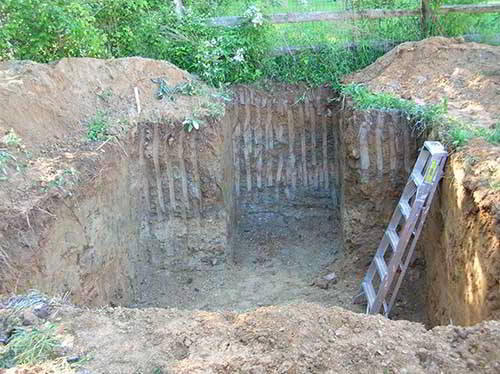
Dig a hole in the ground. We are fortunate to have a local gravedigger who is a real artist with a backhoe. He can carve a hole with straight sides almost within an inch of what you ask for.
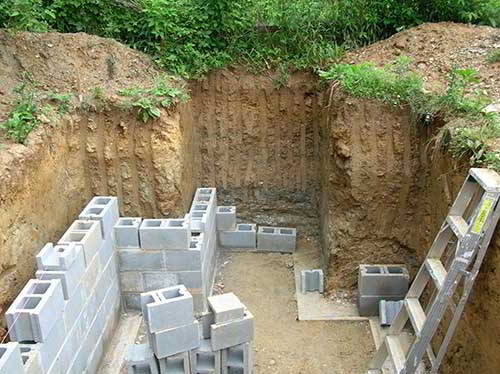
#Step two:
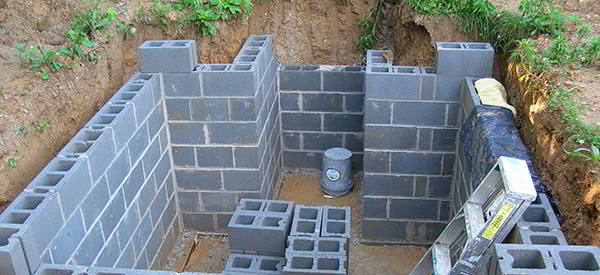
Pour a concrete footer. Then start laying blocks. About 320 went into this 8 x 8 foot cellar.
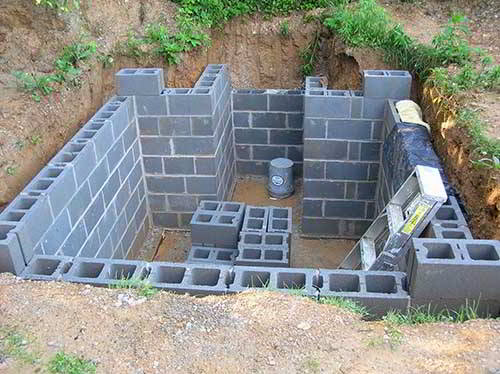
Almost finished here.
Now, for the fun part, pouring a concrete roof. A simple flat slab wouldn’t do, for you want condensation to run off to the sides. So, I created a plywood from with an arched top. The arch would also create a stronger roof. It also created a very strong form. I built the form in the shop, then dismantled it. The arches are 1/2 inch plywood pressed into dadoed grooves in the 2×4’s. This created an extremely strong structure.
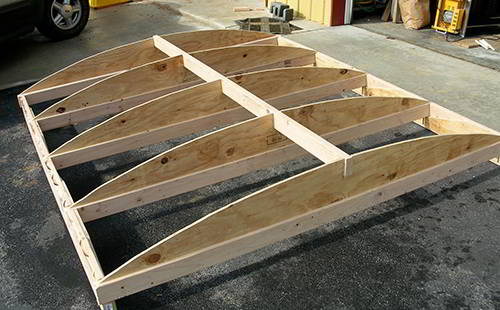
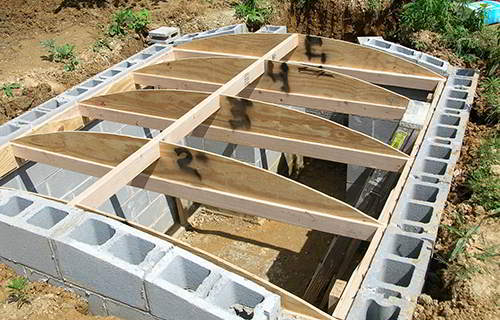
Satisfied with the form I reassembled it on the root cellar walls.
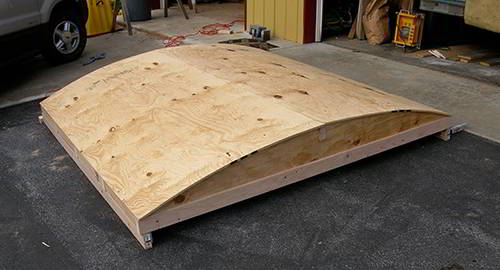
A nice snug fit, supported by 3 vertical 2×4’s on each side. (Not shown in the picture are 8 pieces of 1/2″ plywood approximately 6″ x 23″. These were installed after the plywood sheets were added. They are used as extra reinforcing ribs by wedging them between the plywood sheets and the top of the 2×4’s.)
⇒ 5 Ingenious Ways To Refrigerate Your Food Without Electricity
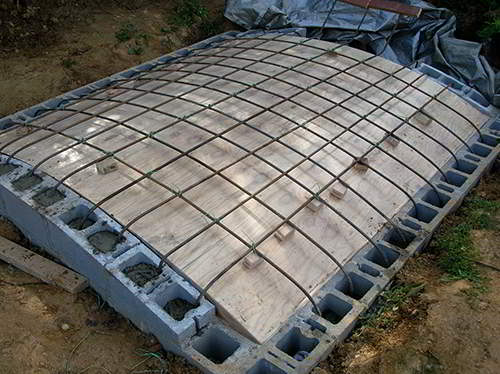
Next, the plywood, a sheet of plastic and lots of 1/2 rebar. Lots of rebar. Rebar is cheap, so why not? If this were a flat 4 inch slab, the calculated load rating is around 250 pounds/square foot. More then enough. But it is arched, and up to 5 inches thick. Also the rebar extends into the walls a foot, and are cemented in place. Not sure what the load rating is now, but it is certainly more than adequate.
18 half inch rebars on 8 inch centers. Strong enough!
Next, add a perimeter to the form and pour concrete. About 4,000 pounds worth. I expected at least a little deformation of my form, for all that weight was being borne by my 5 arches, but there was none! Impressive.
Not taking any chances, I did not enter the cellar until I was confident the concrete was fully cured. Removing the form from inside was not difficult, for it was designed for easy disassembly and re-use.
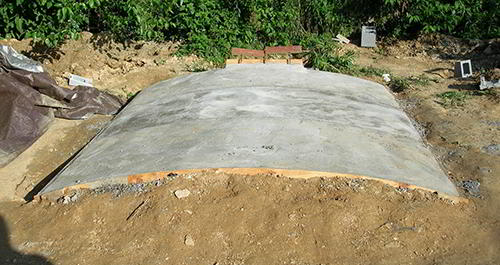
A view of the top before the entrance was completed and the cellar covered with 2 feet of earth. The wood at the rear is covering the ends of the rebar to prevent injury. They will be part of the reinforcement for the entrance-way.
⇒How To Build a Small Root Cellar and Bunker in Your Backyard with $400
I poured the roof in 3 sections, for that is the most concrete I can handle working alone. The seams are nearly invisible from below, and are waterproof. It was not difficult creating the arch in the top using standard concrete. The radius of the top arch is about 6 inches larger than below.
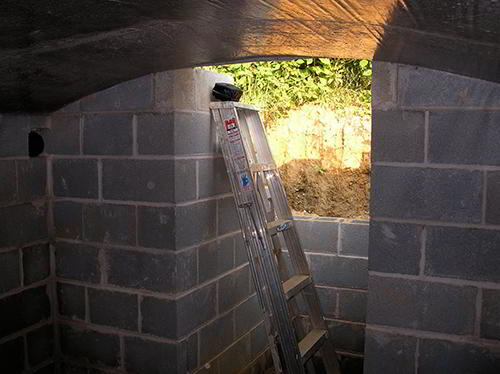
The arched ceiling is as glossy as a counter top, thanks to the plastic sheet I laid over the plywood. See light reflecting off ceiling in picture below.
Add stairs and doors at top and bottom, and you have a fine root cellar, ready for lots of fruits and vegetables. Currently we are storing apples, carrots and potatoes, and we are pleased with the results. One of the two 4 inch vents can be seen in the corner. The other is in the opposite corner.
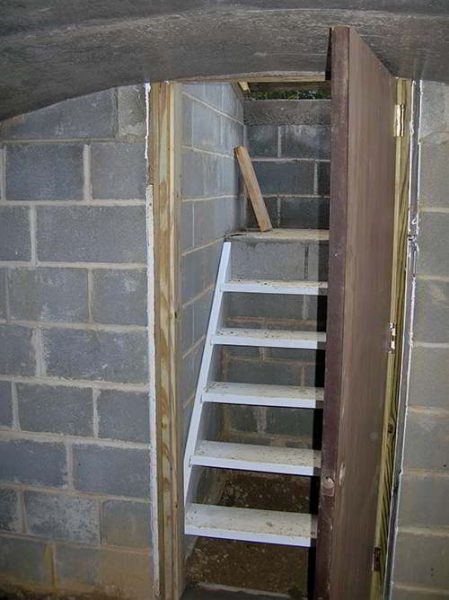
To save labor and materials, I built the stairway with half of it on a foundation at the floor level, and the other half of the foundation just below the frost line. I felt that digging the entire stairwell to the floor level would have just created a large inaccessible space.
This project took a few months of evenings after work over the summer. It was cooler then, and the mortar did not dry too fast. All concrete and mortar, about 8,000 pounds in all, was either mixed with a small mixer, or by hand.
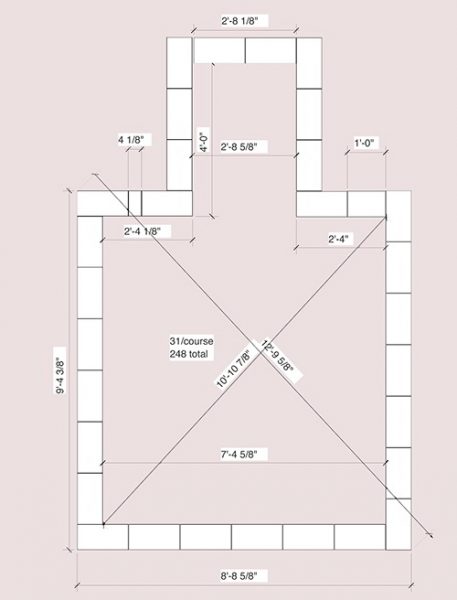
Here is a drawing of the block layout. In order to center my stairwell, I had to cut some blocks into two pieces, a 12 inch piece, and a 4 inch piece. That is because my interior width is 88 inches. If you make your width 96 inches, you will not have to do this. A wet tile saw cuts through concrete blocks with ease.
I have used mine to cut many blocks, including the angled pieces that form the arched tops of the walls. Since the saw can only cut about 1/2 inch deep, you make a cut on each side. The blocks will easily split then by driving a chisel into the cut. Make gentle taps, while moving the chisel along the cut and they will break cleanly. You can see how good the cuts are in the pictures of the walls before the roof was poured.
For those who are serious about self-sufficiency, I strongly recommend this guide. It offers invaluable insights and practical advice for transforming your backyard into a self-sustaining homestead.
First thing you’ll find out is that all you need to be self sufficient in terms of food are just 1,020 square feet of land per person, if you follow the methods we developed. That’s less than 10% of our entire ¼ acre parcel you can see in our sketch.
We developed this plan on quarter of an acre for a family of 4 to be totally self-sufficient, and have goods to sell and sustain a healthy profit year round. But we created it in such a way that it is easy to downsize if you have less land or fewer family members.

Anyone can join.
Anyone can contribute.
Anyone can become informed about their world.
"United We Stand" Click Here To Create Your Personal Citizen Journalist Account Today, Be Sure To Invite Your Friends.
Humic & Fulvic Liquid Trace Mineral Complex
HerbAnomic’s Humic and Fulvic Liquid Trace Mineral Complex is a revolutionary New Humic and Fulvic Acid Complex designed to support your body at the cellular level. Our product has been thoroughly tested by an ISO/IEC Certified Lab for toxins and Heavy metals as well as for trace mineral content. We KNOW we have NO lead, arsenic, mercury, aluminum etc. in our Formula. This Humic & Fulvic Liquid Trace Mineral complex has high trace levels of naturally occurring Humic and Fulvic Acids as well as high trace levels of Zinc, Iron, Magnesium, Molybdenum, Potassium and more. There is a wide range of up to 70 trace minerals which occur naturally in our Complex at varying levels. We Choose to list the 8 substances which occur in higher trace levels on our supplement panel. We don’t claim a high number of minerals as other Humic and Fulvic Supplements do and leave you to guess which elements you’ll be getting. Order Your Humic Fulvic for Your Family by Clicking on this Link , or the Banner Below.

Our Formula is an exceptional value compared to other Humic Fulvic Minerals because...
It’s OXYGENATED
It Always Tests at 9.5+ pH
Preservative and Chemical Free
Allergen Free
Comes From a Pure, Unpolluted, Organic Source
Is an Excellent Source for Trace Minerals
Is From Whole, Prehisoric Plant Based Origin Material With Ionic Minerals and Constituents
Highly Conductive/Full of Extra Electrons
Is a Full Spectrum Complex
Our Humic and Fulvic Liquid Trace Mineral Complex has Minerals, Amino Acids, Poly Electrolytes, Phytochemicals, Polyphenols, Bioflavonoids and Trace Vitamins included with the Humic and Fulvic Acid. Our Source material is high in these constituents, where other manufacturers use inferior materials.
Try Our Humic and Fulvic Liquid Trace Mineral Complex today. Order Yours Today by Following This Link.


| Online: | |
| Visits: | 1,614,918,727 |
| Stories: | 8,184,289 |
Whistler Blowers, Insiders
