
How to Preserve Stock & Meat for Long-term Food Storage

By Survivopedia
In a survival situation, ensuring you get enough protein will make a big difference. But you can’t always depend on electricity to be there.
What’s more, where I live, we hunt a lot of game. So, our freezer fills up fast. Which is a big reason we preserve our food. To save on space, and to avoid waste. So, without delay, let’s get to it!

Step 1 – How to Prepare Your Stock
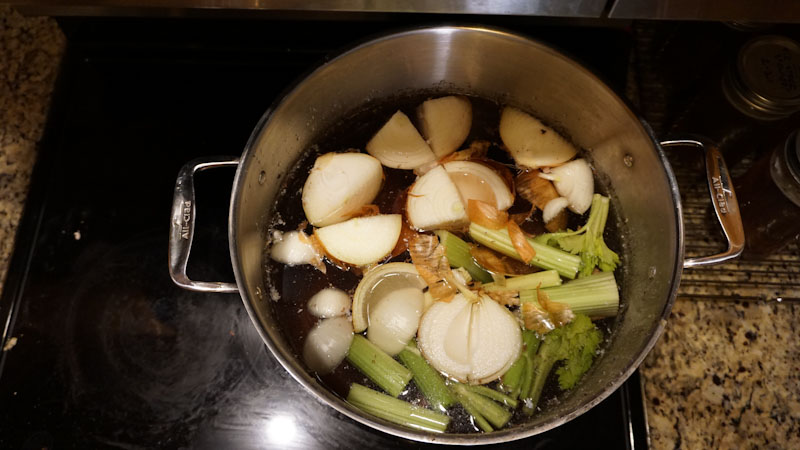
For the stock, your first step is to boil a bit pot of water. Here you will add whatever vegetables, bones, meat, and scraps you wish to use. Before you leave it to simmer overnight (ideally).
Once it’s ready, after filtering the bits out, add your stock to some pre-warmed jars (this’ll stop them from shattering).
Leave about an inch of headspace as you do this.
When you’re done, wipe off the surface and the rims of your jars and lids to ensure a clean point of contact. Then secure your lids tightly.
Step 2 – Adding Your Meat
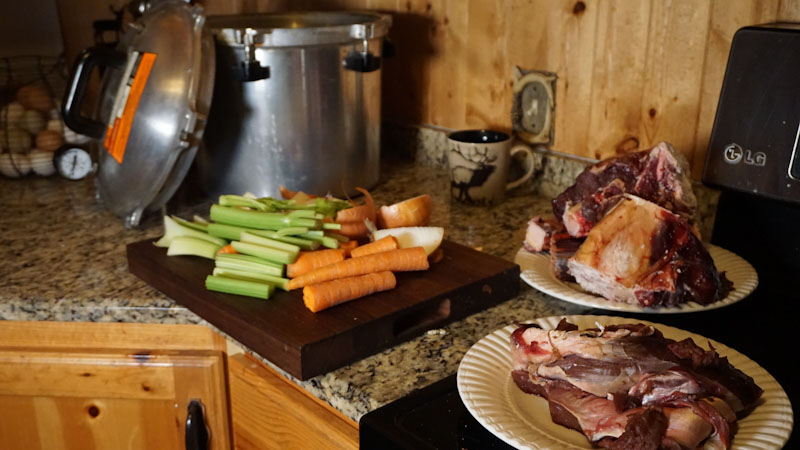
Next, take some cooked meat and pack it into your jars. If it’s still a little pink this is fine as your meat will continue to cook while canning.
As a sidebar, if you’re preserving store-bought meat that’s OK, but in the video above I’ve used cuts from a buck I caught. Just know that, if you buy your meat, high quality chilled meat is best. But the rest is a matter of preference. For example, anything from beef, to lamb, to pork, sausage, veal or even bear meat will do fine.
Ideally your meat would also be freshly cooked, but I have never found that to be practical. One way to avoid this issue is to slowly raise the temperature of the jar as you can it.
Once your meat is really packed in, top up your cans with either water or stock. Again, while leaving a little headspace. Press your mixture down to remove any bubbles before wiping your lids and secure them tightly.
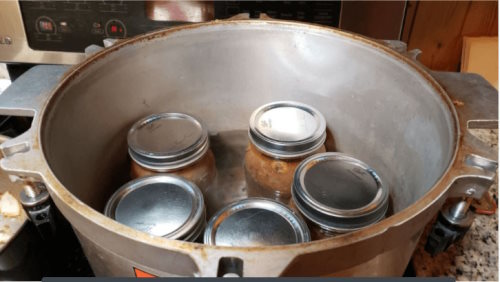
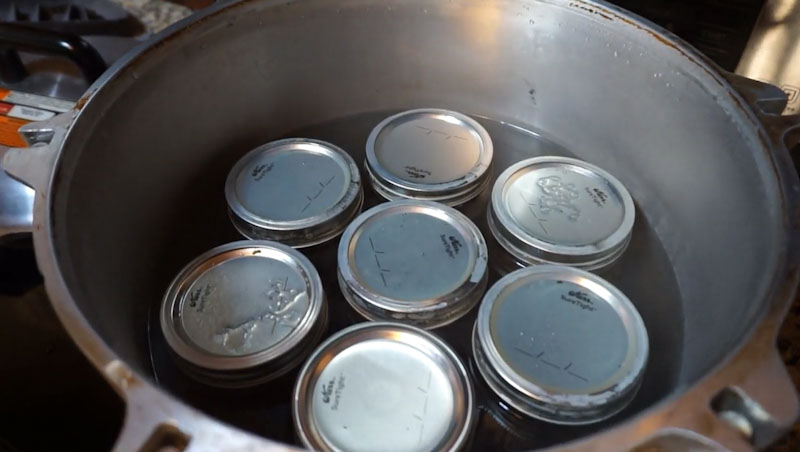
The next step is to put your jars into a pressure canner. They should be also be fully submerged.
Before you close the lid of your pressure canner add some olive oil to your canner’s rim so it’s easier to remove later. Now you’re ready to heat your canner.
Step 3 – How to Can Your Meat
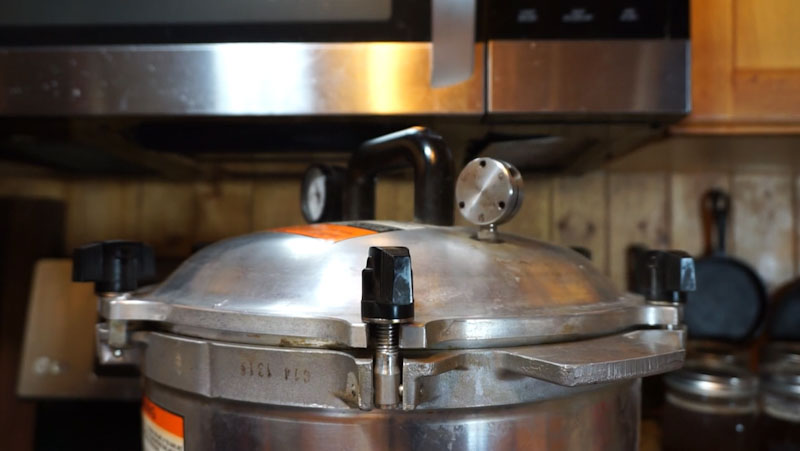
Switch on the heat. Once it’s been venting for 10 minutes, you’ll want to put on the weight. I have set mine to fifteen pounds. But, for a more accurate image of what to do, you should consult your canner’s instructions.
Weight Pointers:
For weighted-gauge canners:
- At up to 1,000 feet above sea level, use 10 pounds of pressure.
- At above 1,000 feet above sea level, use 15 pounds of pressure.
For dial-gauge canners:
- At up to 2,000 feet above sea level, use 11 pounds of pressure.
- At 2,001 to 4,000 feet above sea level, use 12 pounds of pressure.
- At 4,001 to 6,000 feet above sea level, use 13 pounds of pressure.
- At 6,001 to 8,000 feet above sea level, use 14 pounds of pressure.
- At 8,001 to 10,000 feet above sea level, use 15 pounds of pressure.
Once your weight starts to rattle, leave it for 20 minutes. That’s all you need when it’s stock only (for pints). When it’s meat you’ll need to leave it for 75 minutes.
For quart jars you’ll need to leave them for 25 and 90 minutes, respectively.
Do not remove the weight from the vent early. Otherwise, you could negatively affect the seals of your jars. Then wait for the pressure and temperature of your canner to dissipate naturally. Take care to check the pressure and temperature of your lid before you remove it.
Step 4 – Removing Your Jars
Then transfer your jars (with tongs) to an appropriate surface to cool off on. Here, they’ll continue to bubble for a few hours.
If your jar lids pop up, this indicates that they did not seal properly. But don’t worry, you can always reprocess them. Once your jars have cooled, simply store them in a cool-dark place until they’re ready to eat. These should safely store for 2 to 5 years. Or even longer.
This article was inspired by ”The Lost Frontier Handbook”. The Lost Frontier Handbook is a guide created by Suzanne Sherman. It reveals long-lost skills of our ancestors that helped them survive during a crisis, natural disasters, and emergencies. The handbook contains high-resolution, detailed diagrams and step-by-step instructions on various survival tips and techniques. Some of the valuable lessons that consumers will discover include medicinal remedies, stockpiling and preserving foods, finding a steady supply of clean water off the grid, and many more. In addition, the content involves step-by-step instructions and detailed images. You can get your copy HERE !

Anyone can join.
Anyone can contribute.
Anyone can become informed about their world.
"United We Stand" Click Here To Create Your Personal Citizen Journalist Account Today, Be Sure To Invite Your Friends.
Humic & Fulvic Liquid Trace Mineral Complex
HerbAnomic’s Humic and Fulvic Liquid Trace Mineral Complex is a revolutionary New Humic and Fulvic Acid Complex designed to support your body at the cellular level. Our product has been thoroughly tested by an ISO/IEC Certified Lab for toxins and Heavy metals as well as for trace mineral content. We KNOW we have NO lead, arsenic, mercury, aluminum etc. in our Formula. This Humic & Fulvic Liquid Trace Mineral complex has high trace levels of naturally occurring Humic and Fulvic Acids as well as high trace levels of Zinc, Iron, Magnesium, Molybdenum, Potassium and more. There is a wide range of up to 70 trace minerals which occur naturally in our Complex at varying levels. We Choose to list the 8 substances which occur in higher trace levels on our supplement panel. We don’t claim a high number of minerals as other Humic and Fulvic Supplements do and leave you to guess which elements you’ll be getting. Order Your Humic Fulvic for Your Family by Clicking on this Link , or the Banner Below.

Our Formula is an exceptional value compared to other Humic Fulvic Minerals because...
It’s OXYGENATED
It Always Tests at 9.5+ pH
Preservative and Chemical Free
Allergen Free
Comes From a Pure, Unpolluted, Organic Source
Is an Excellent Source for Trace Minerals
Is From Whole, Prehisoric Plant Based Origin Material With Ionic Minerals and Constituents
Highly Conductive/Full of Extra Electrons
Is a Full Spectrum Complex
Our Humic and Fulvic Liquid Trace Mineral Complex has Minerals, Amino Acids, Poly Electrolytes, Phytochemicals, Polyphenols, Bioflavonoids and Trace Vitamins included with the Humic and Fulvic Acid. Our Source material is high in these constituents, where other manufacturers use inferior materials.
Try Our Humic and Fulvic Liquid Trace Mineral Complex today. Order Yours Today by Following This Link.


| Online: | |
| Visits: | 1,615,510,256 |
| Stories: | 8,186,304 |
Whistler Blowers, Insiders
